WILD LEEKS

Our love of wild leeks (Allium ursinum, also known as ramps) led us to produce this video and to write about sustainable harvesting. The recent trendiness of wild leeks has been a wonderful thing to see as people have been integrating wild local food into their favourite meals. Unfortunately it has led to a serious decline in wild leek populations, opened the ground up for wild invasive species to move in, and has had a negative impact on the biodiversity of our local ecosystems.

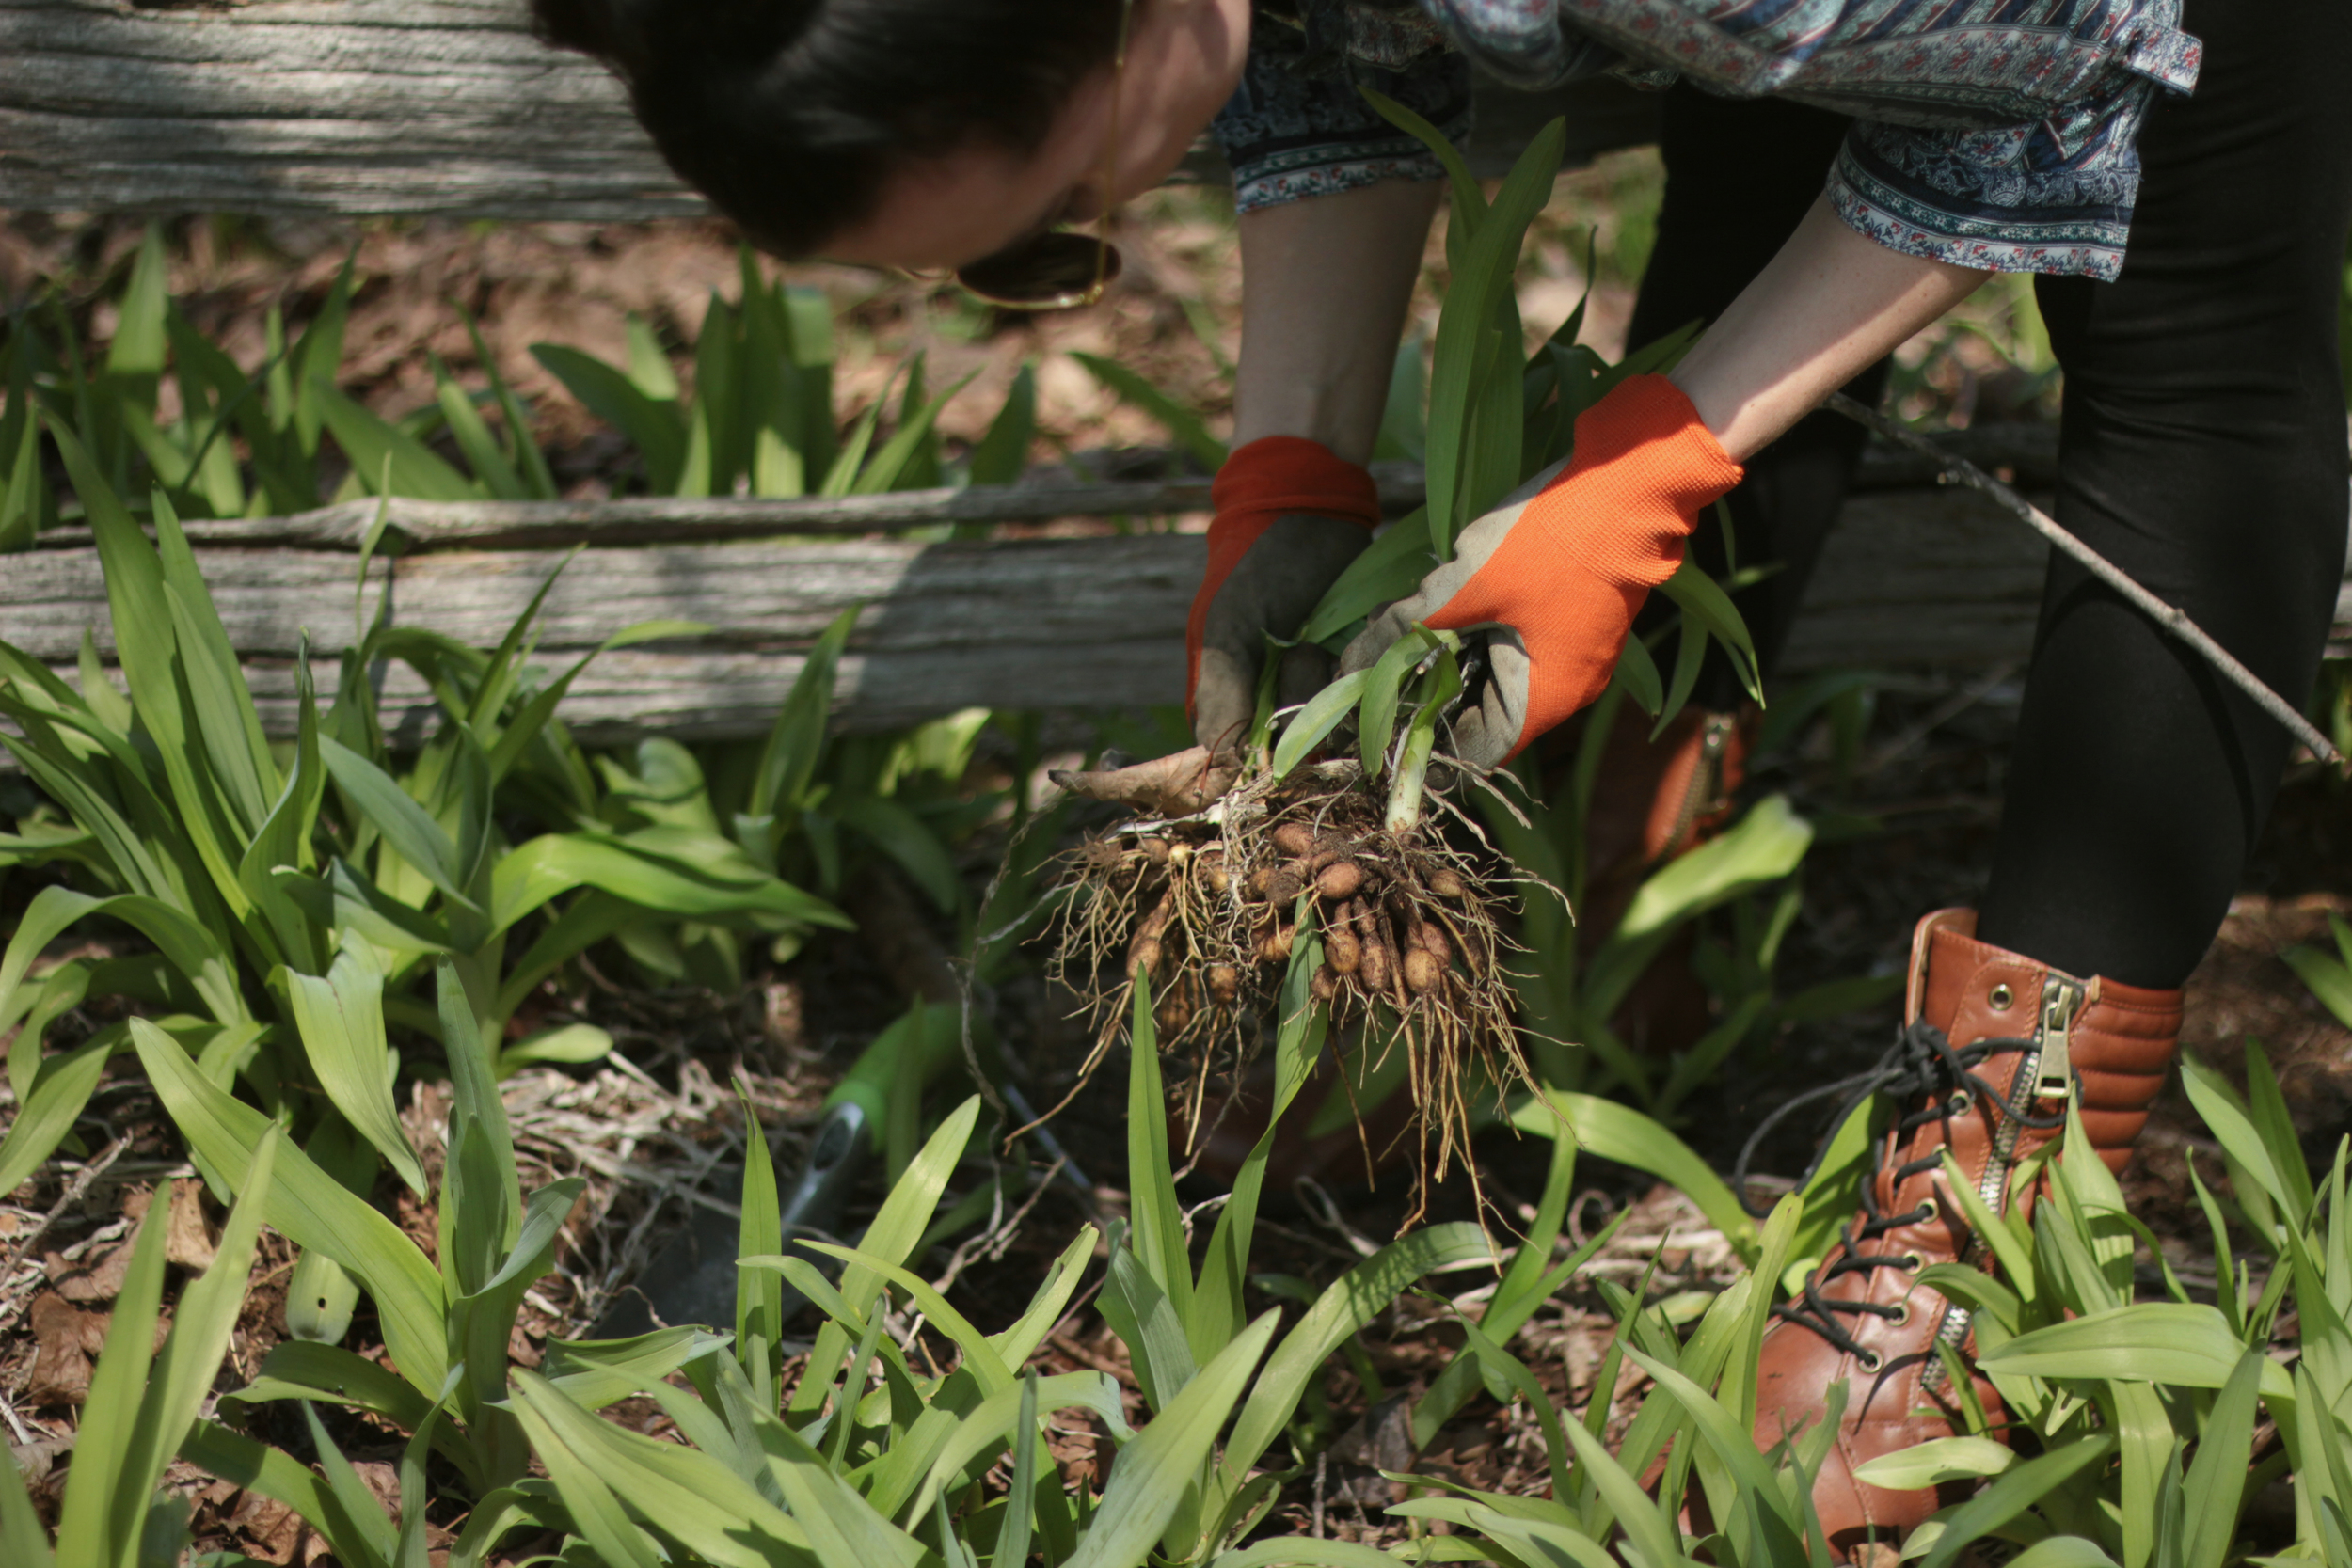
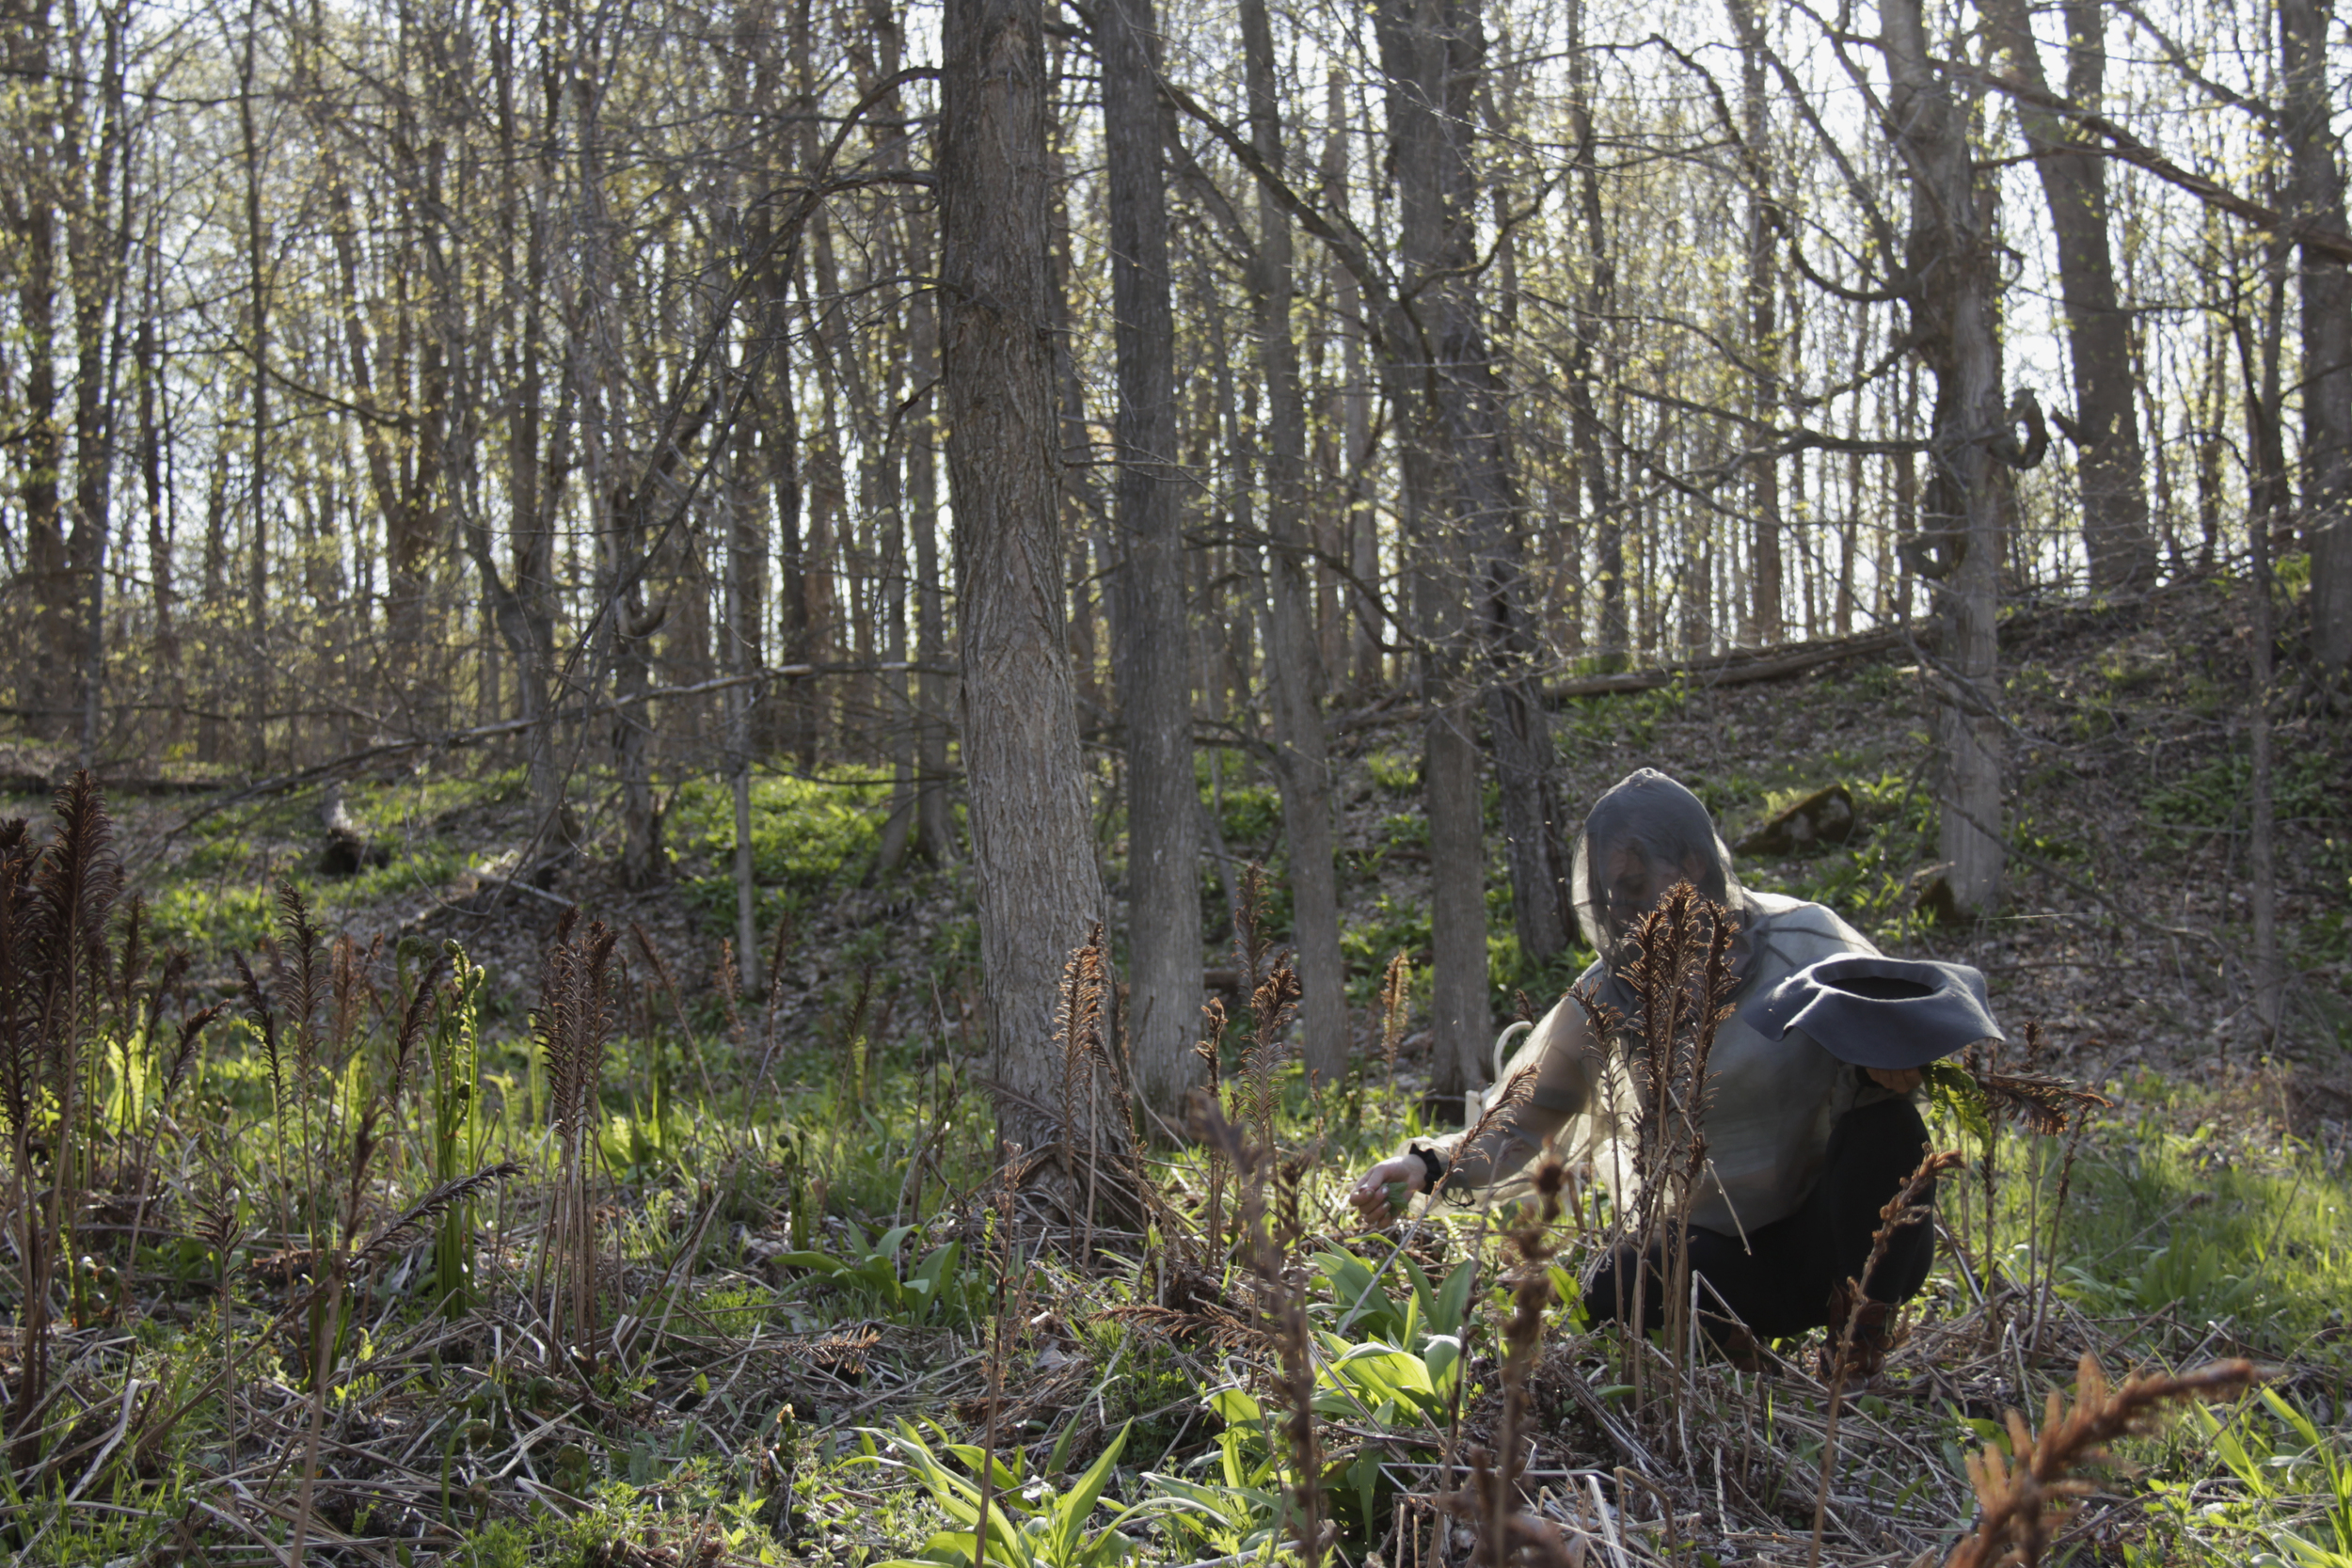
Wild leeks propagated by seed take five to seven years to reach maturity (the point at which they start producing their own seeds). If the whole plant is harvested, this prevents the plant from being able to produce seeds, effectively killing the plant and its ability to reproduce. Luckily, there is a way to continue to enjoy this wild delicacy without threatening its survival. Harvest only one leaf from each plant, from only 10 percent of the plants per patch and do not take the roots. Pick only what you need - a little goes a long way. This ensures that each plant will continue to mature and bare seeds.

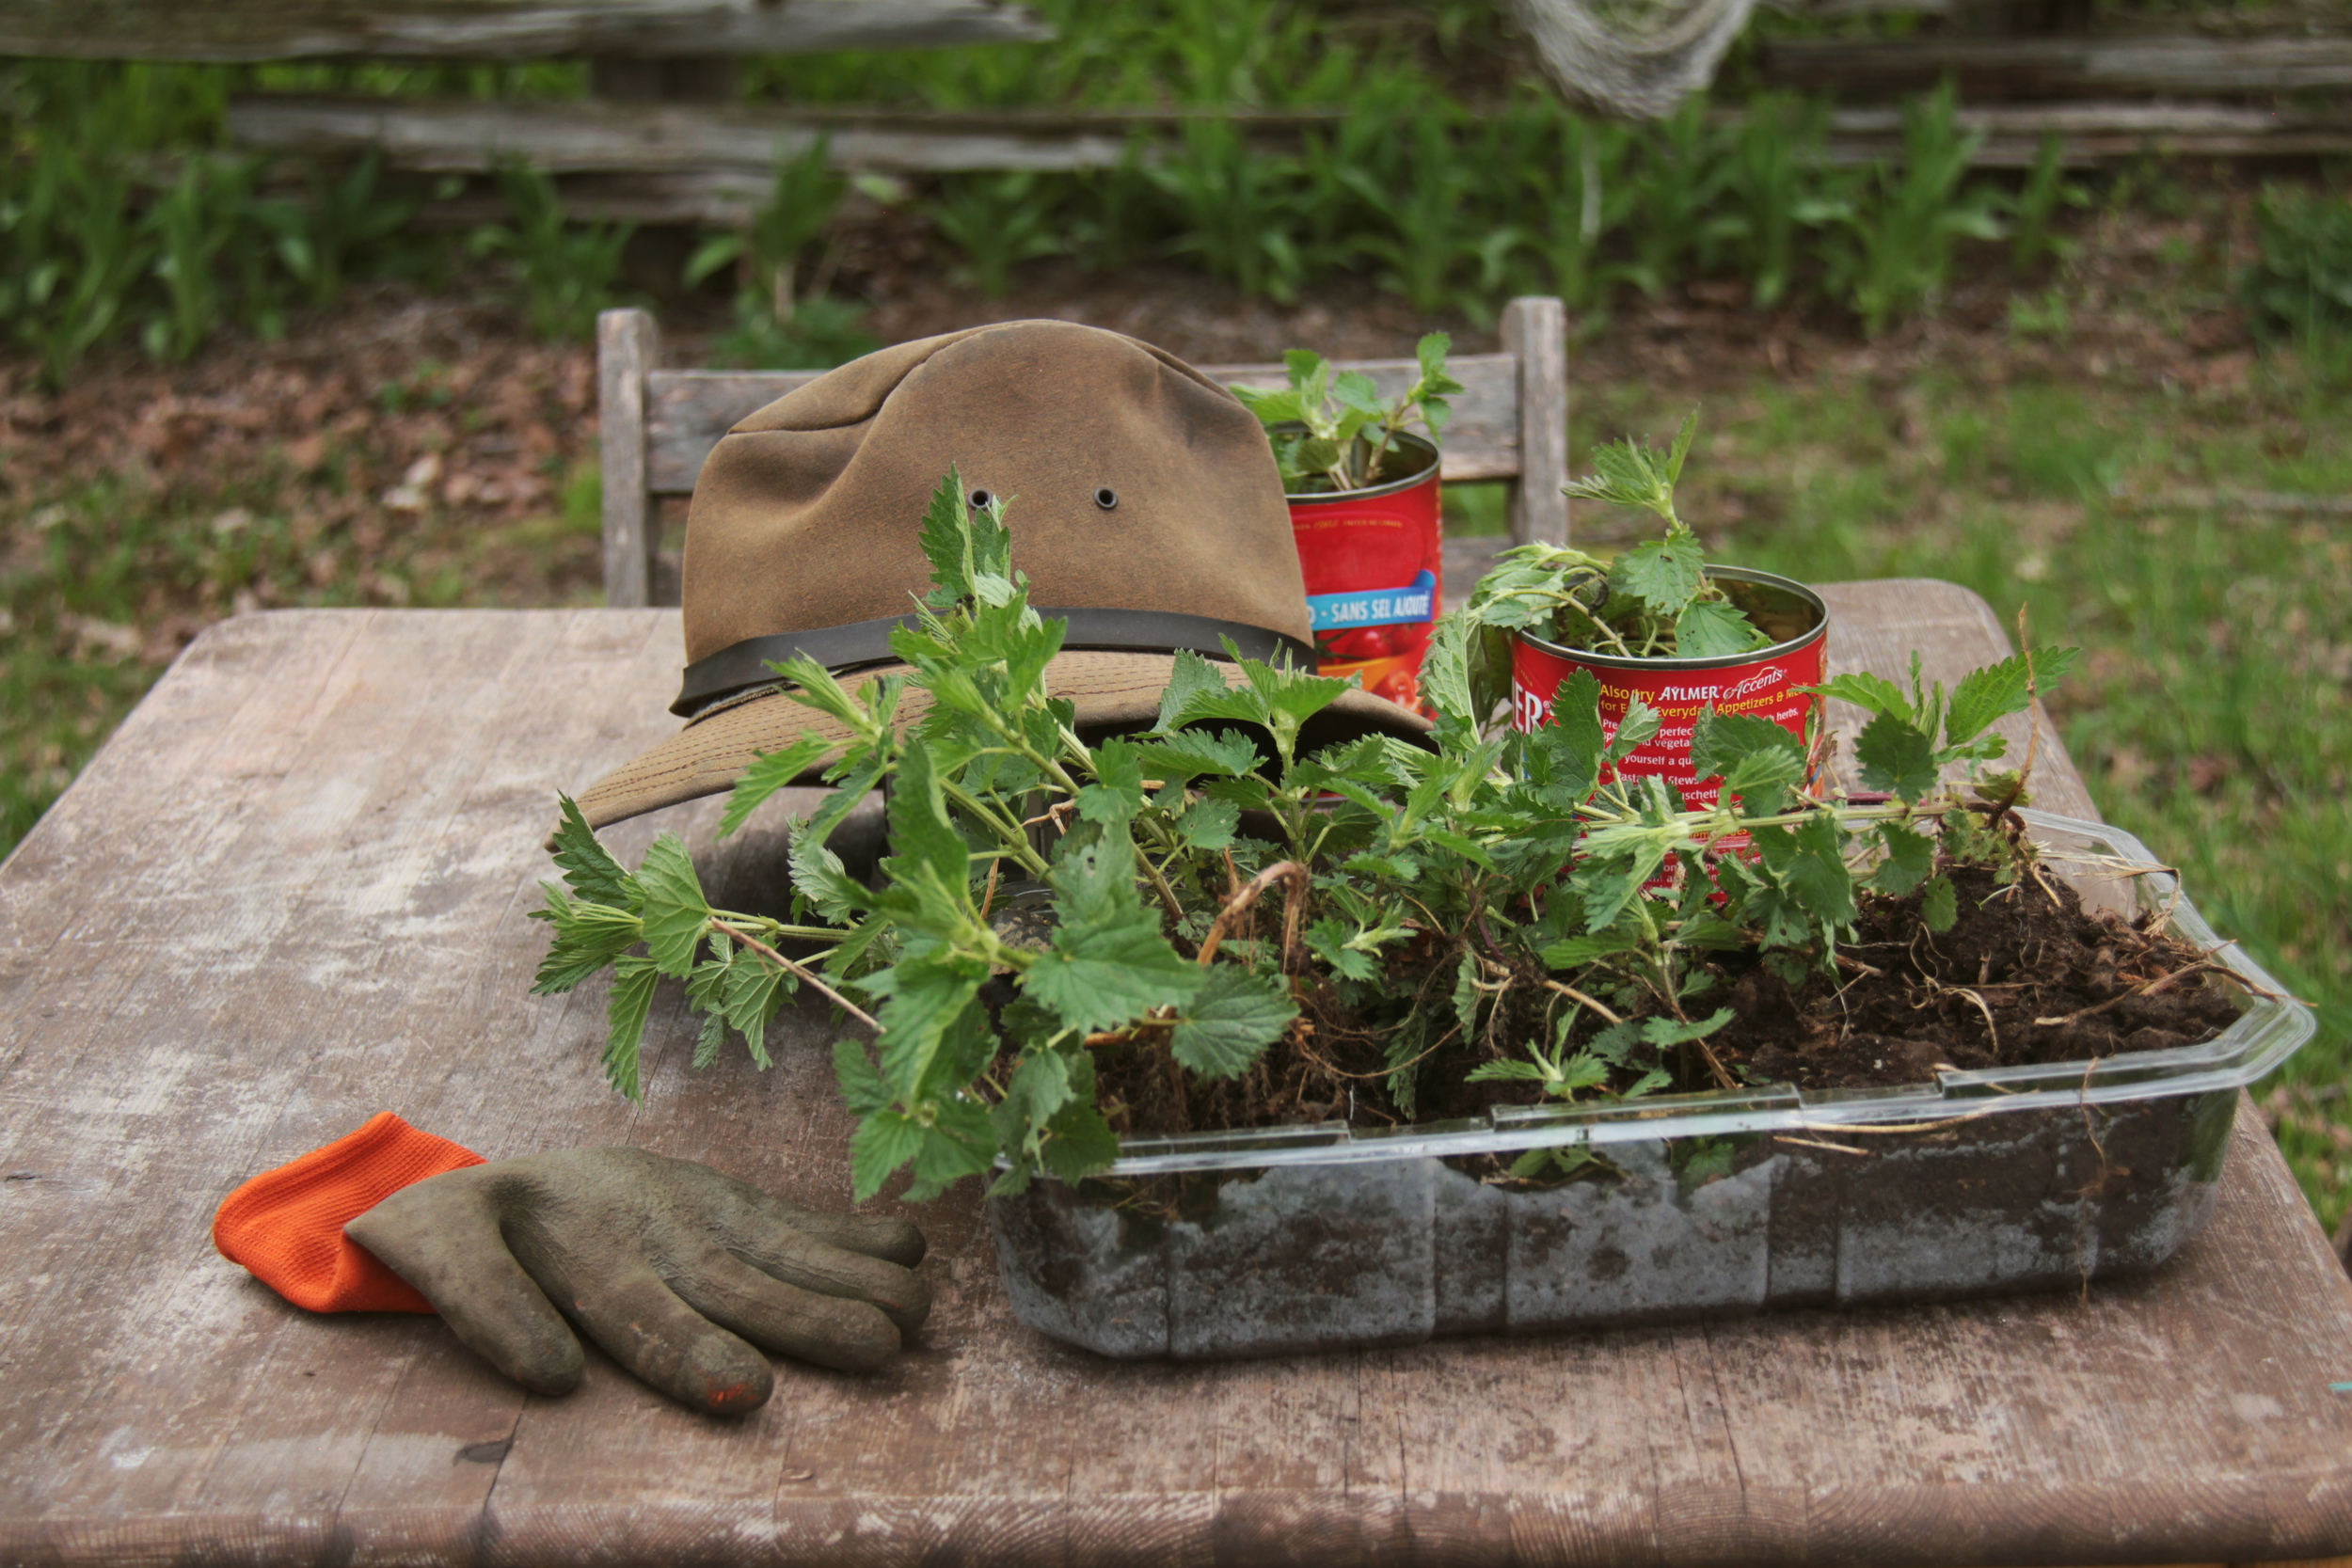
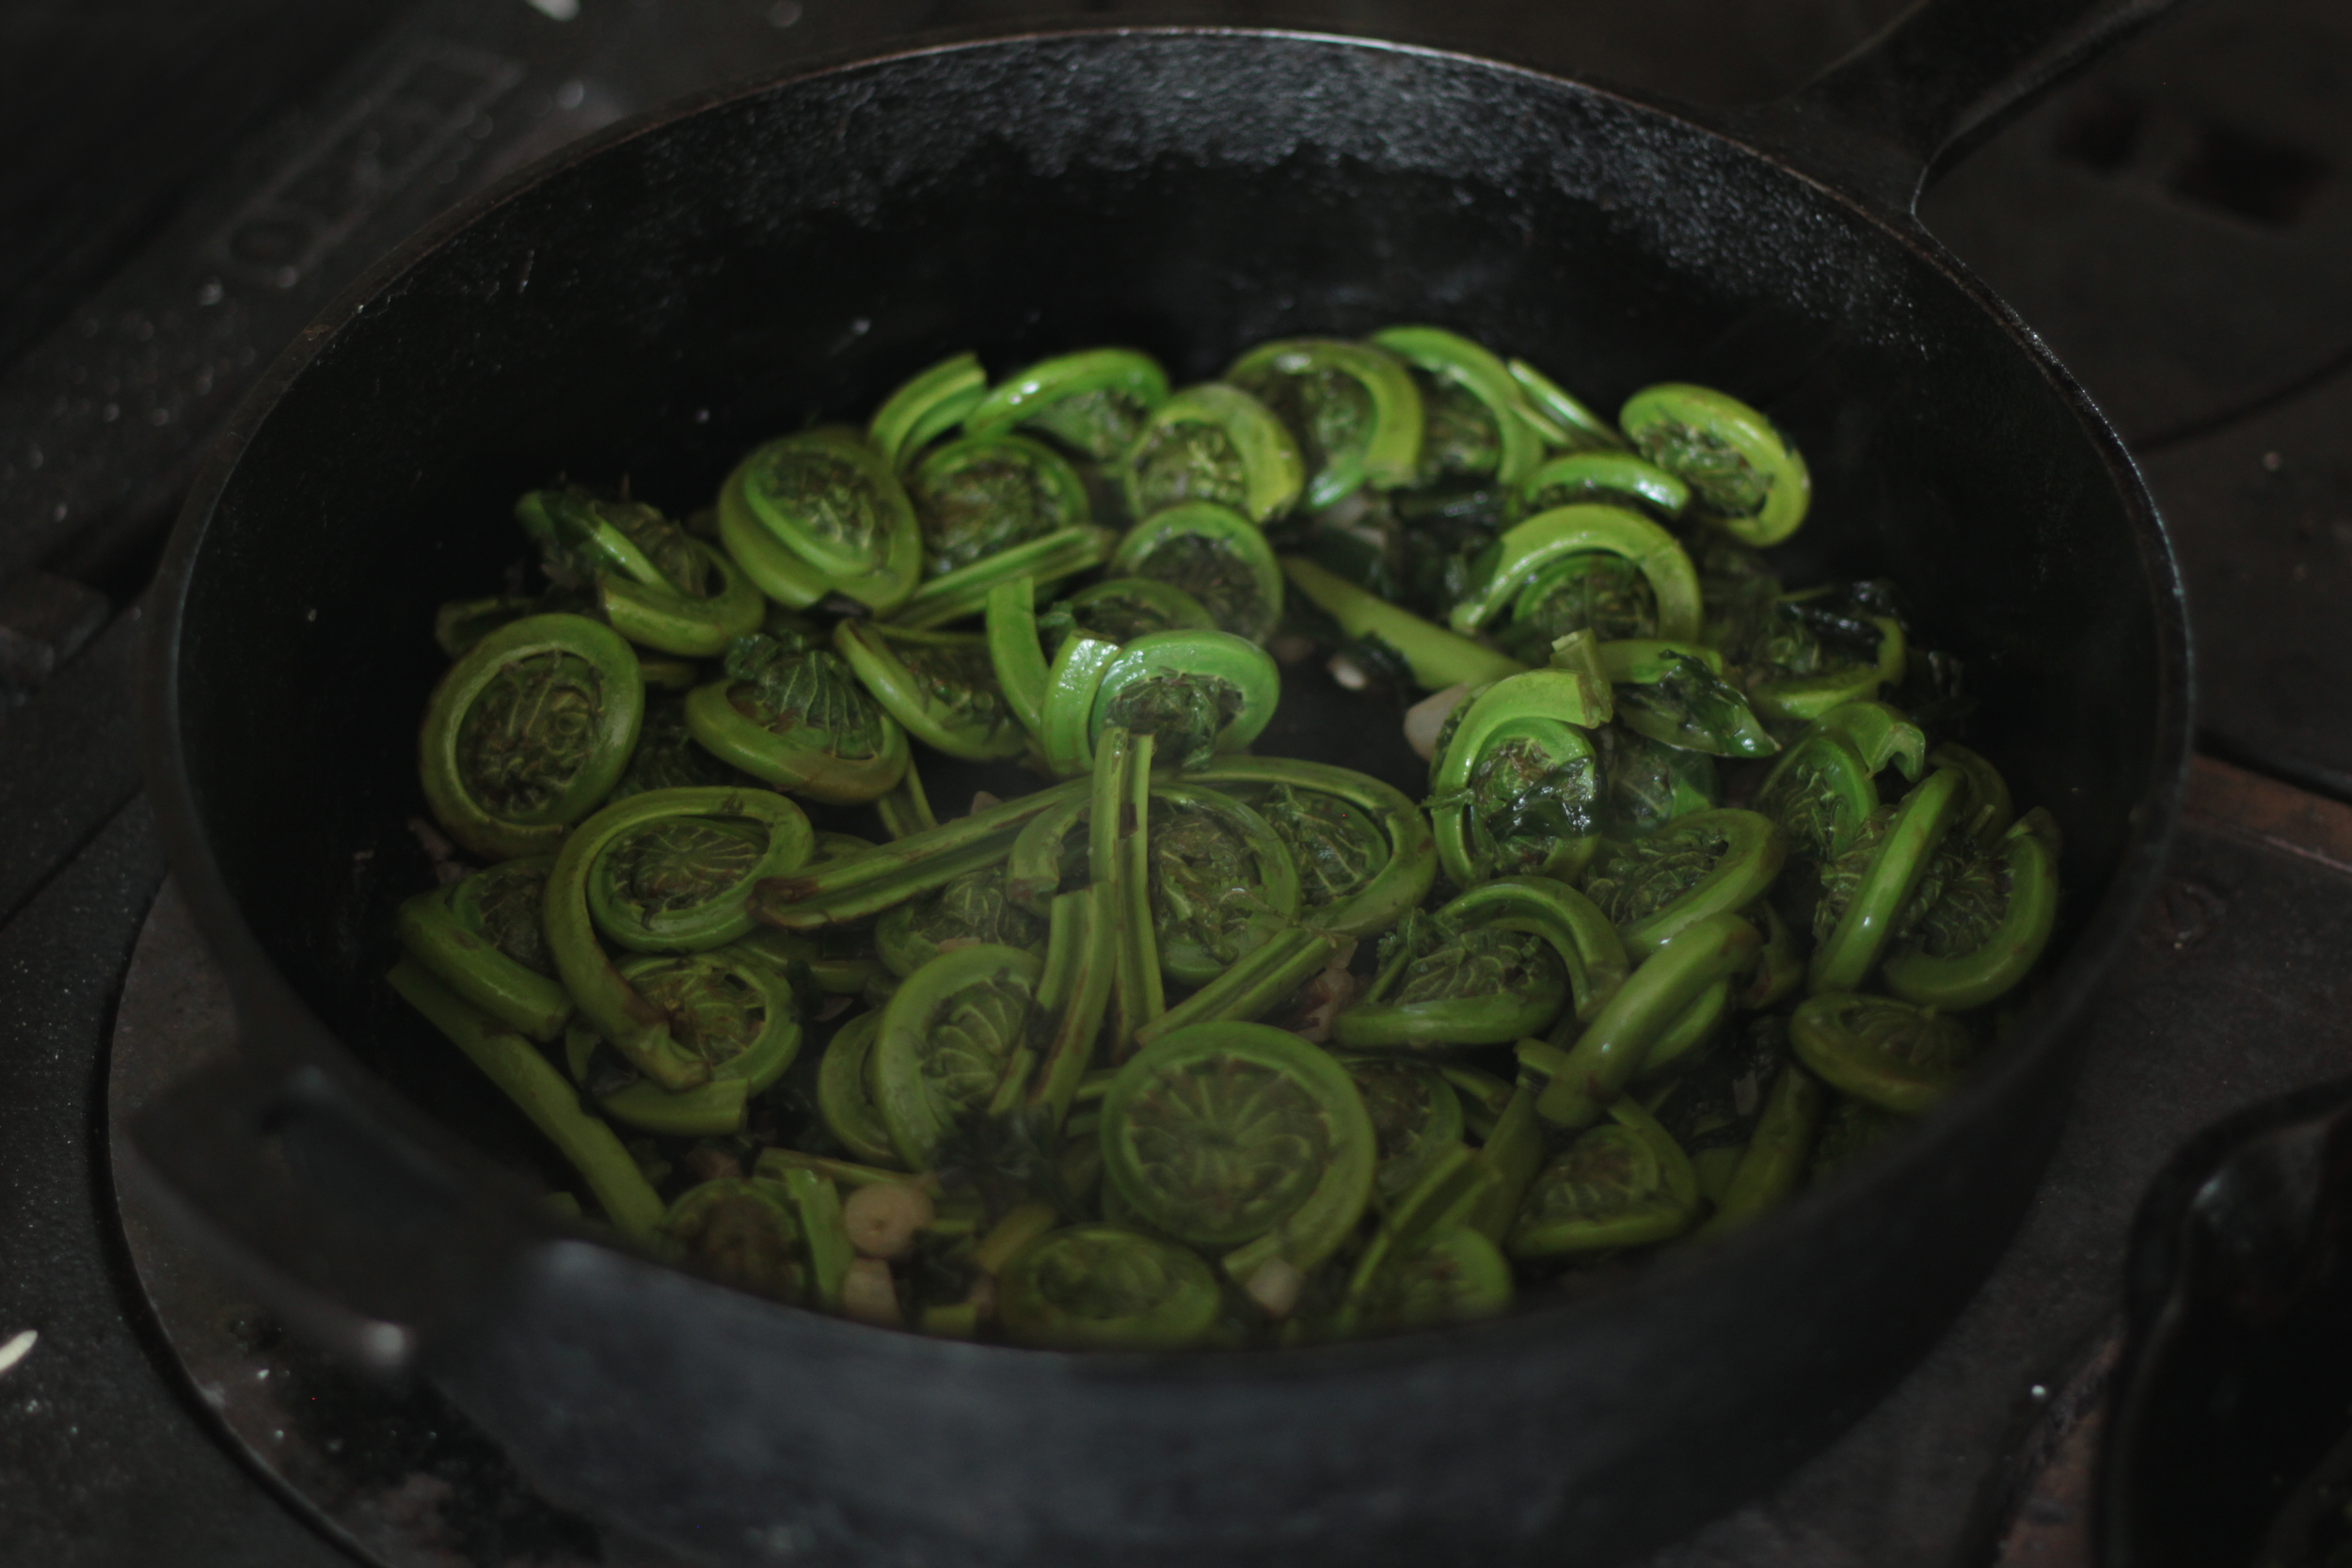
In this video, Courtney harvests some wild leeks and makes a delicious pasta dish, adding some dandelion roots, leaves and buds. You will notice that Courtney only takes one leaf from each wild leek plant. Furthermore, while we shot some of the scenes in public Peterborough parks, we did not harvest from these places but found a robust population on a friend's property. It is illegal to harvest plants in conservation areas for good reason, and the wild leek decline is one of these reasons. If you notice that a patch has already been foraged from, it is best to refrain from picking any more that year. 

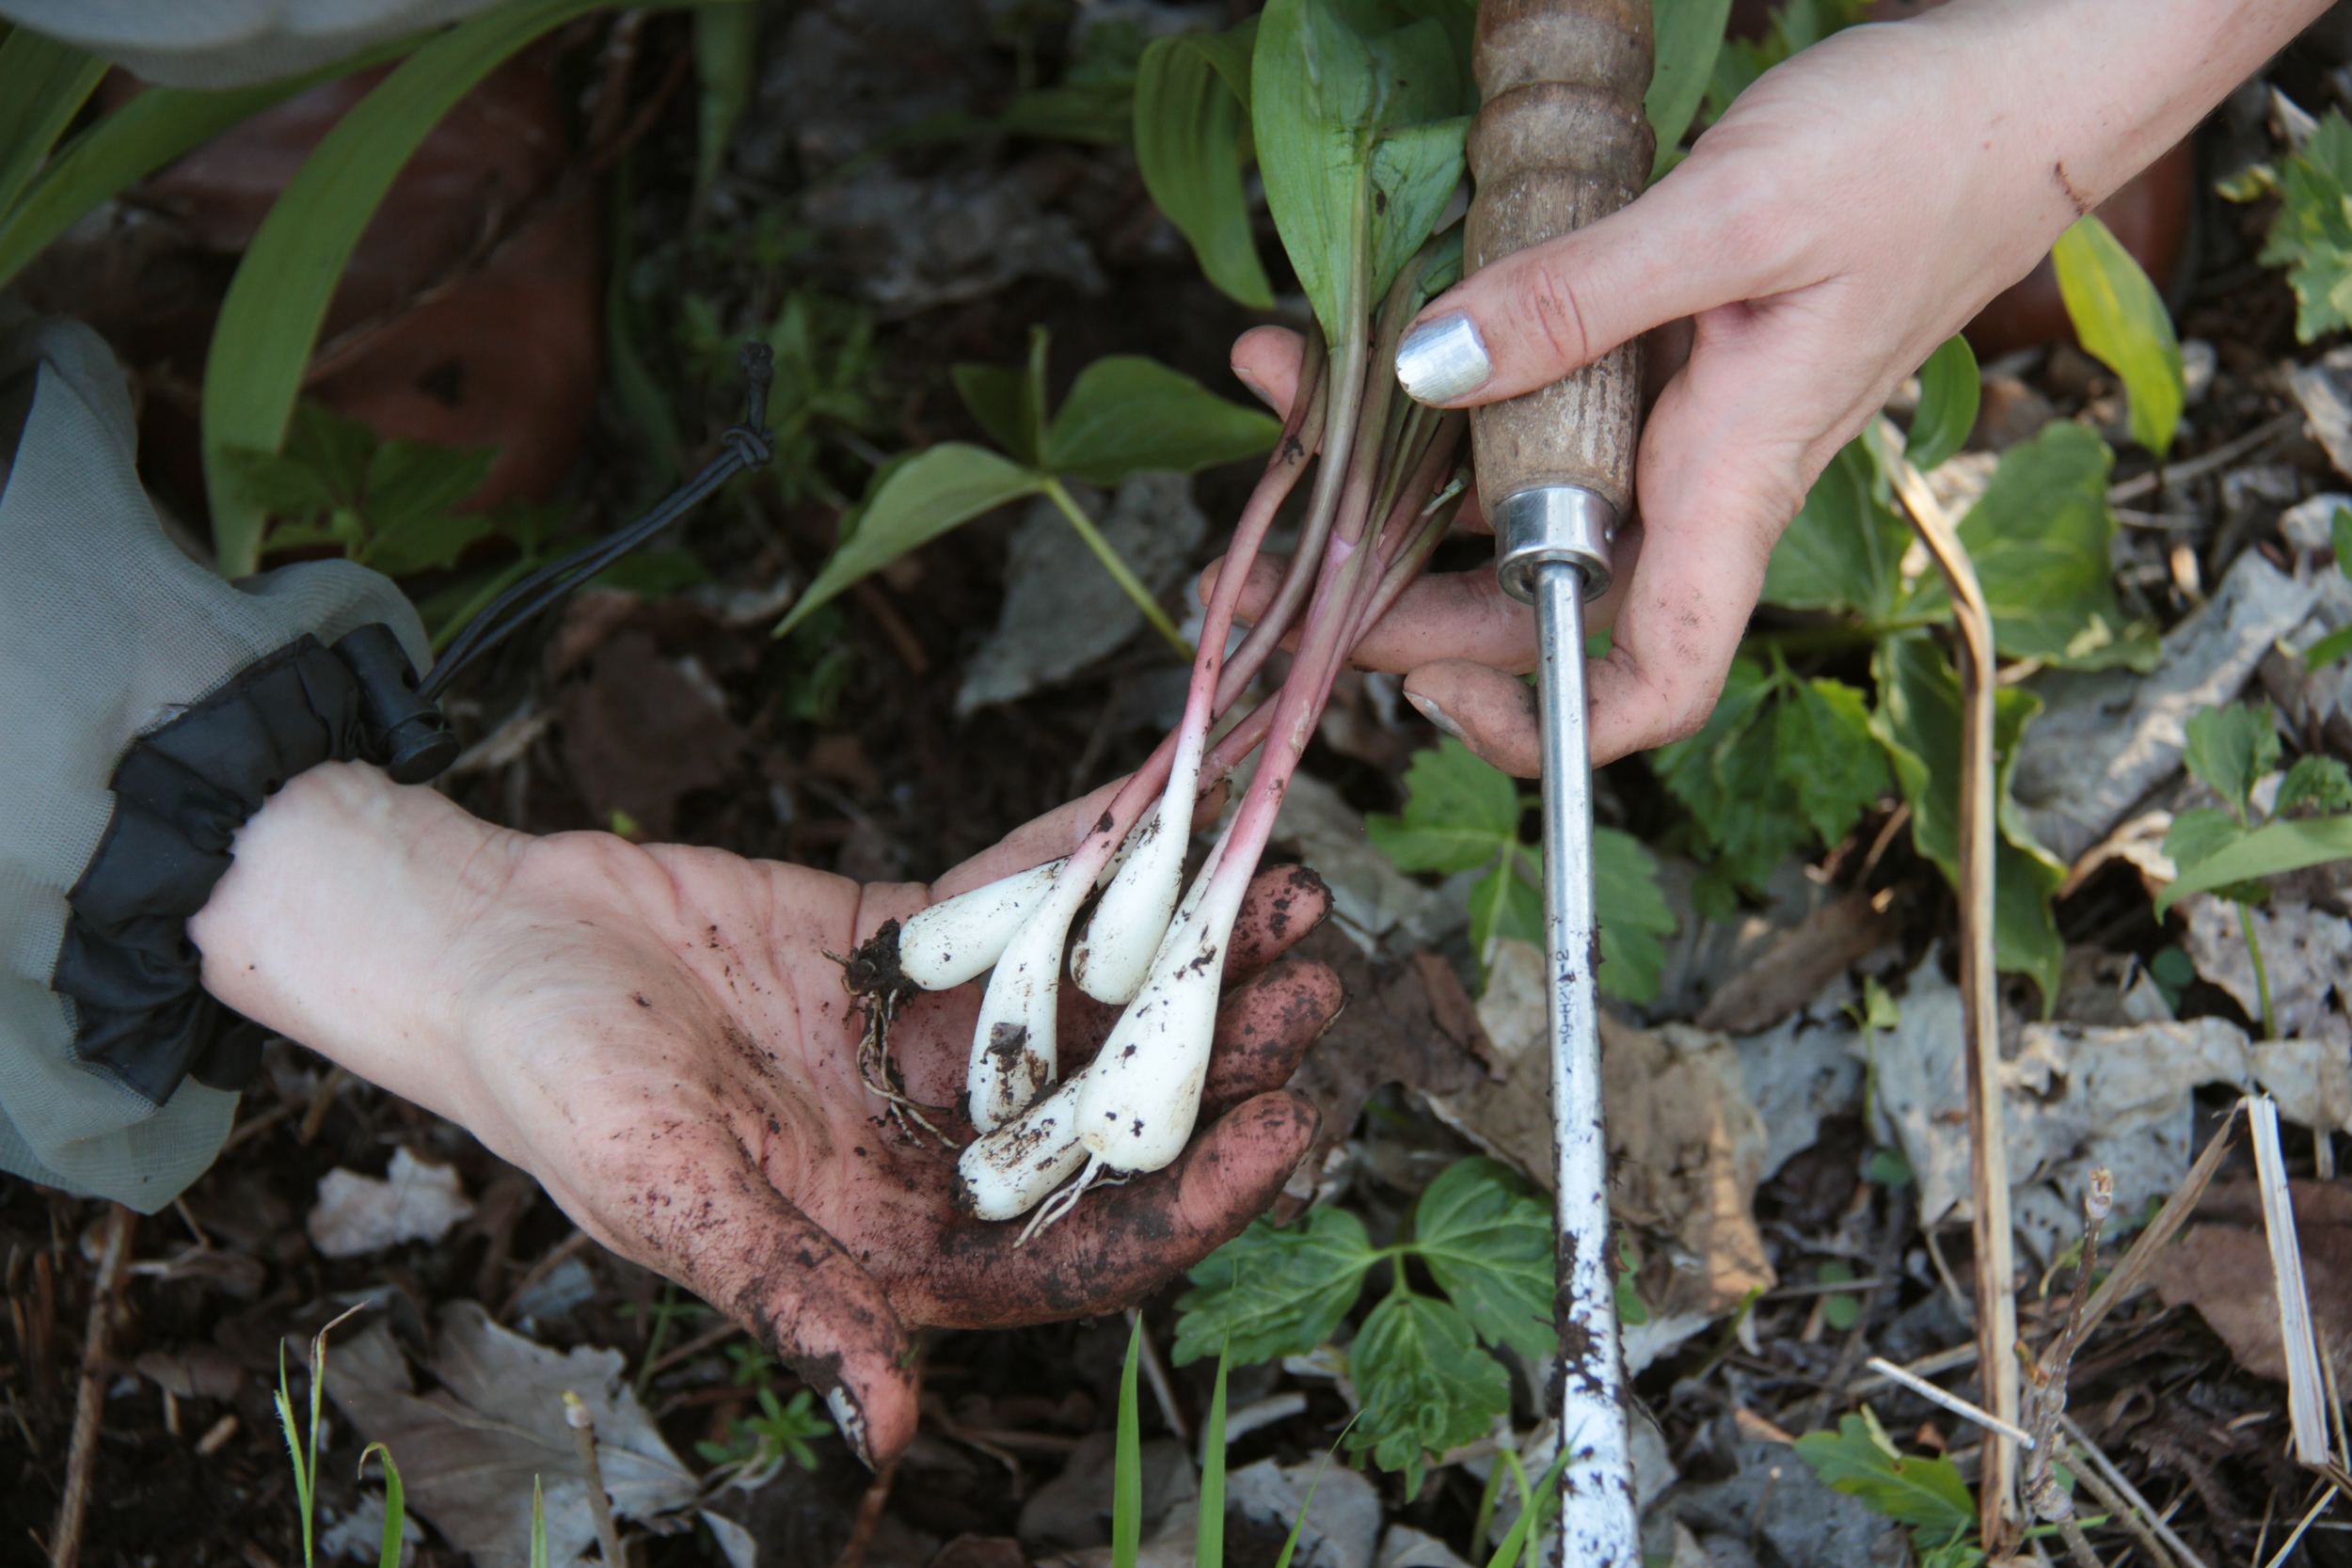
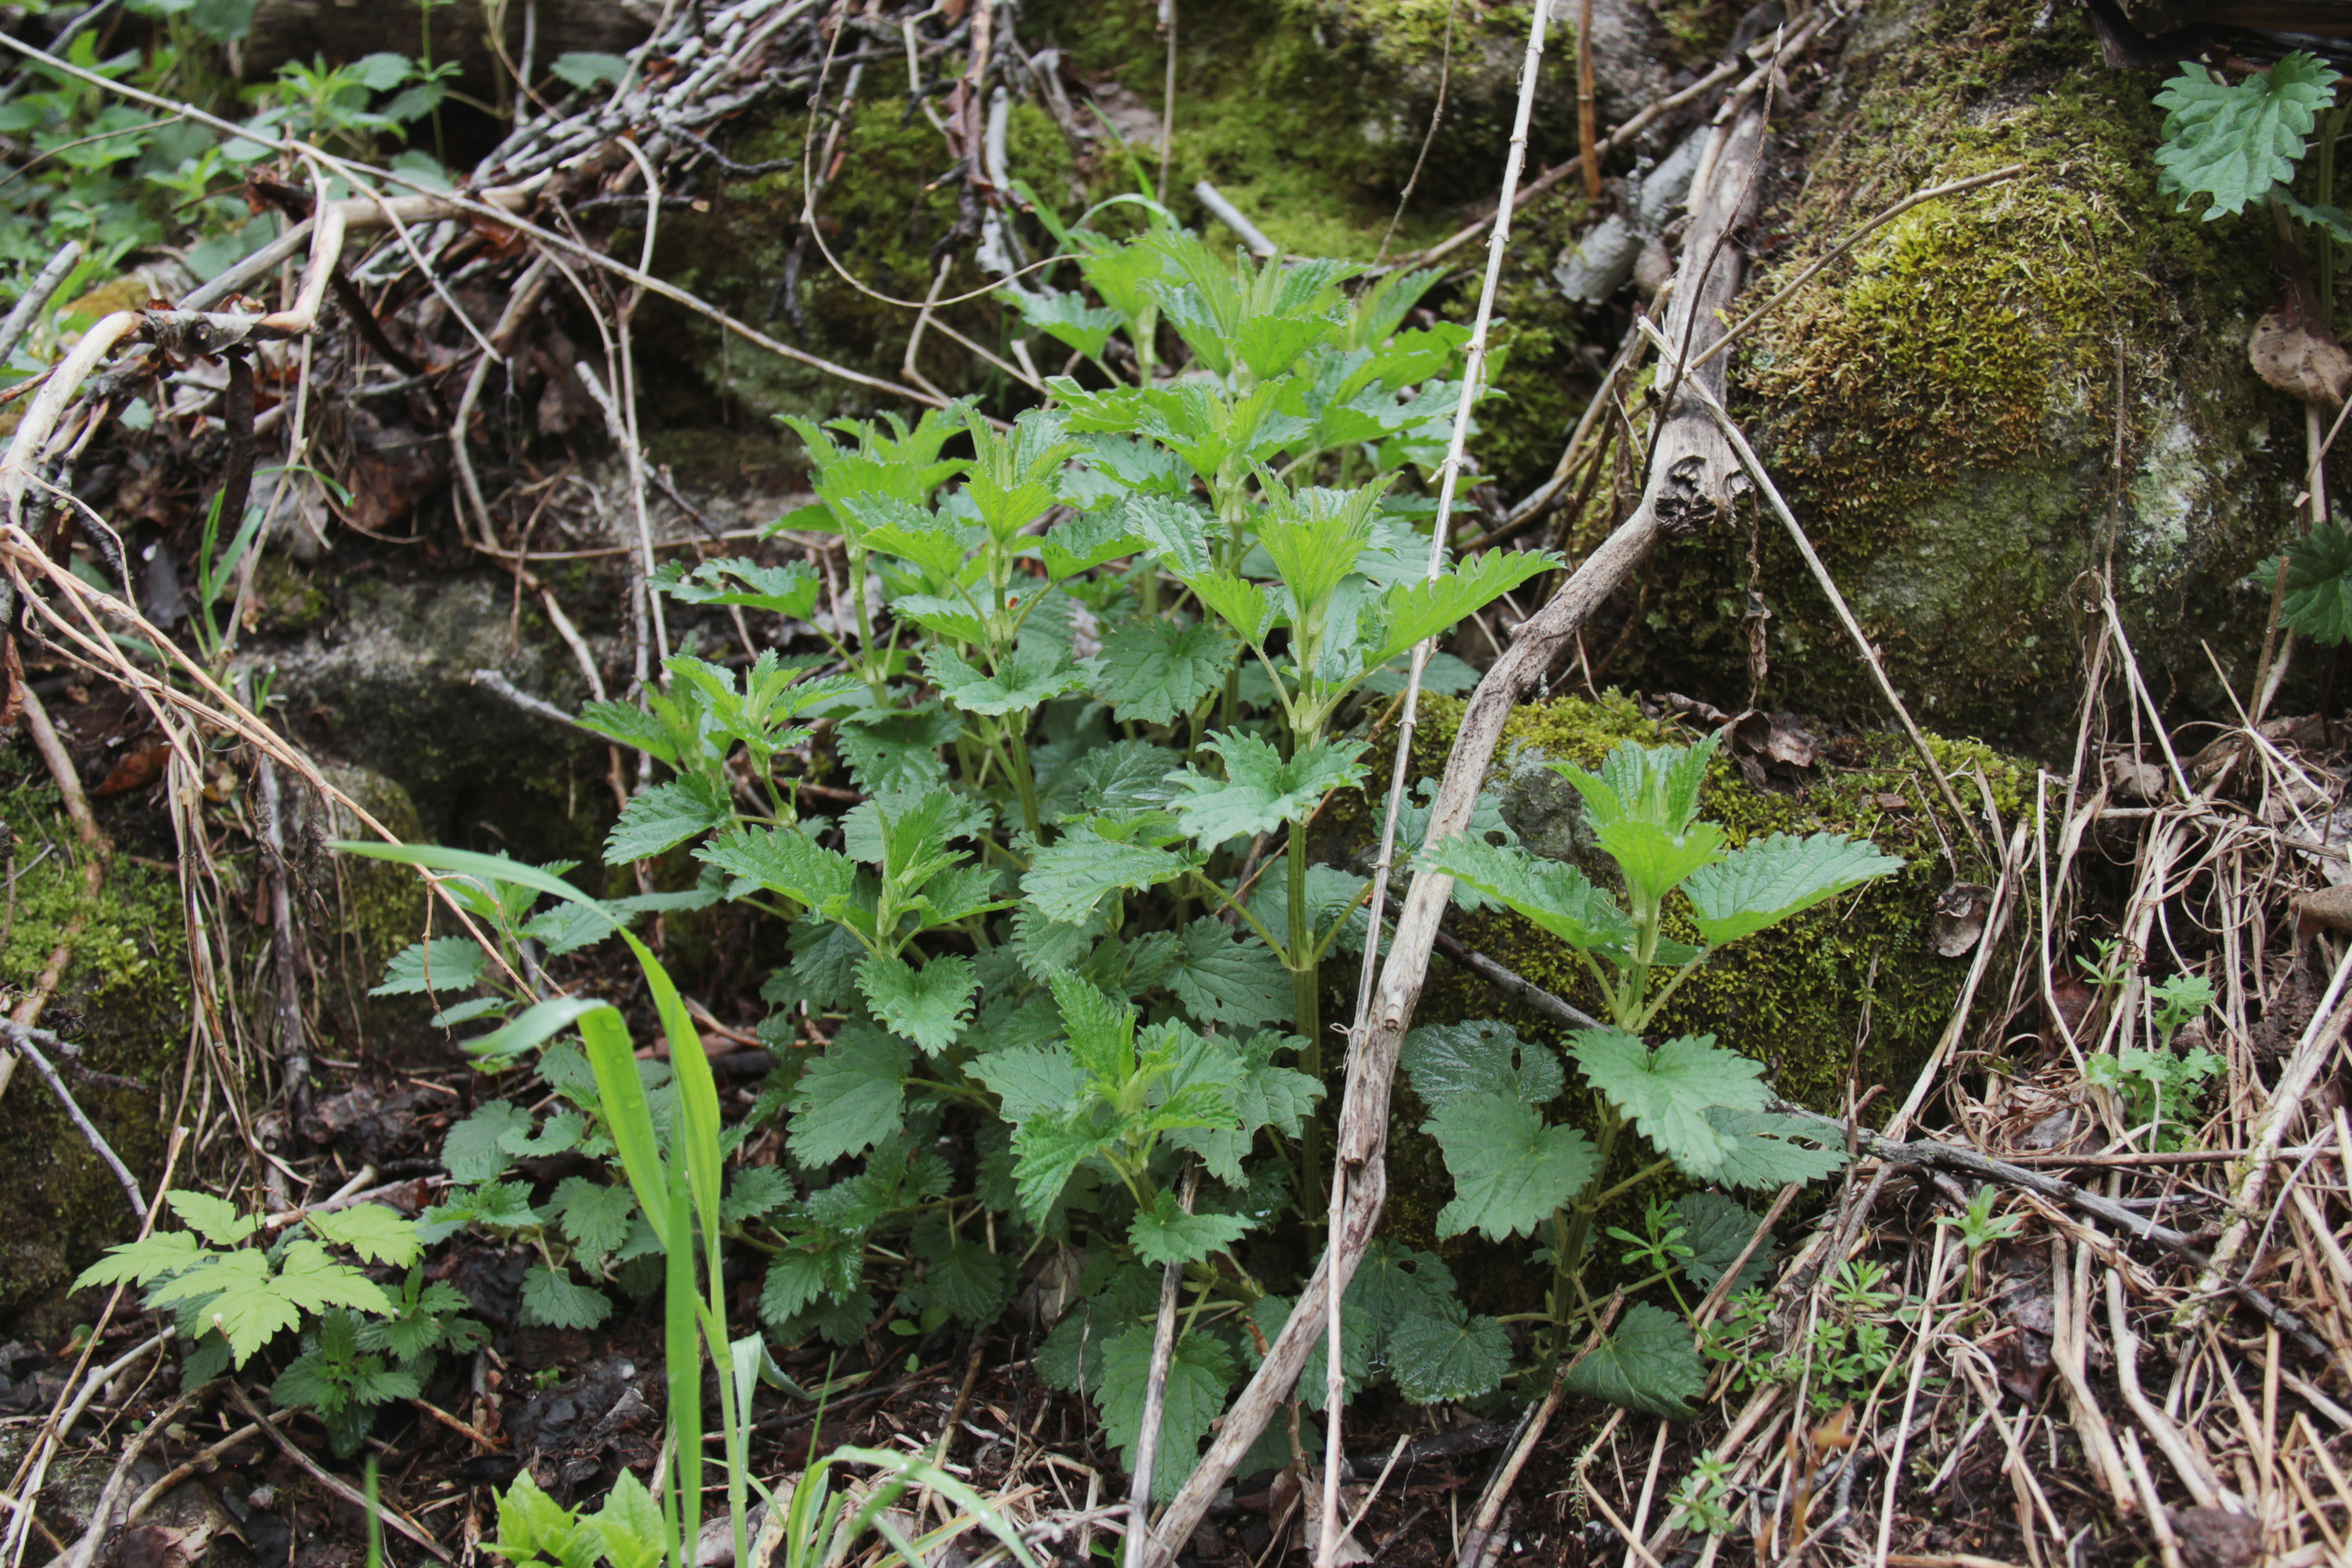
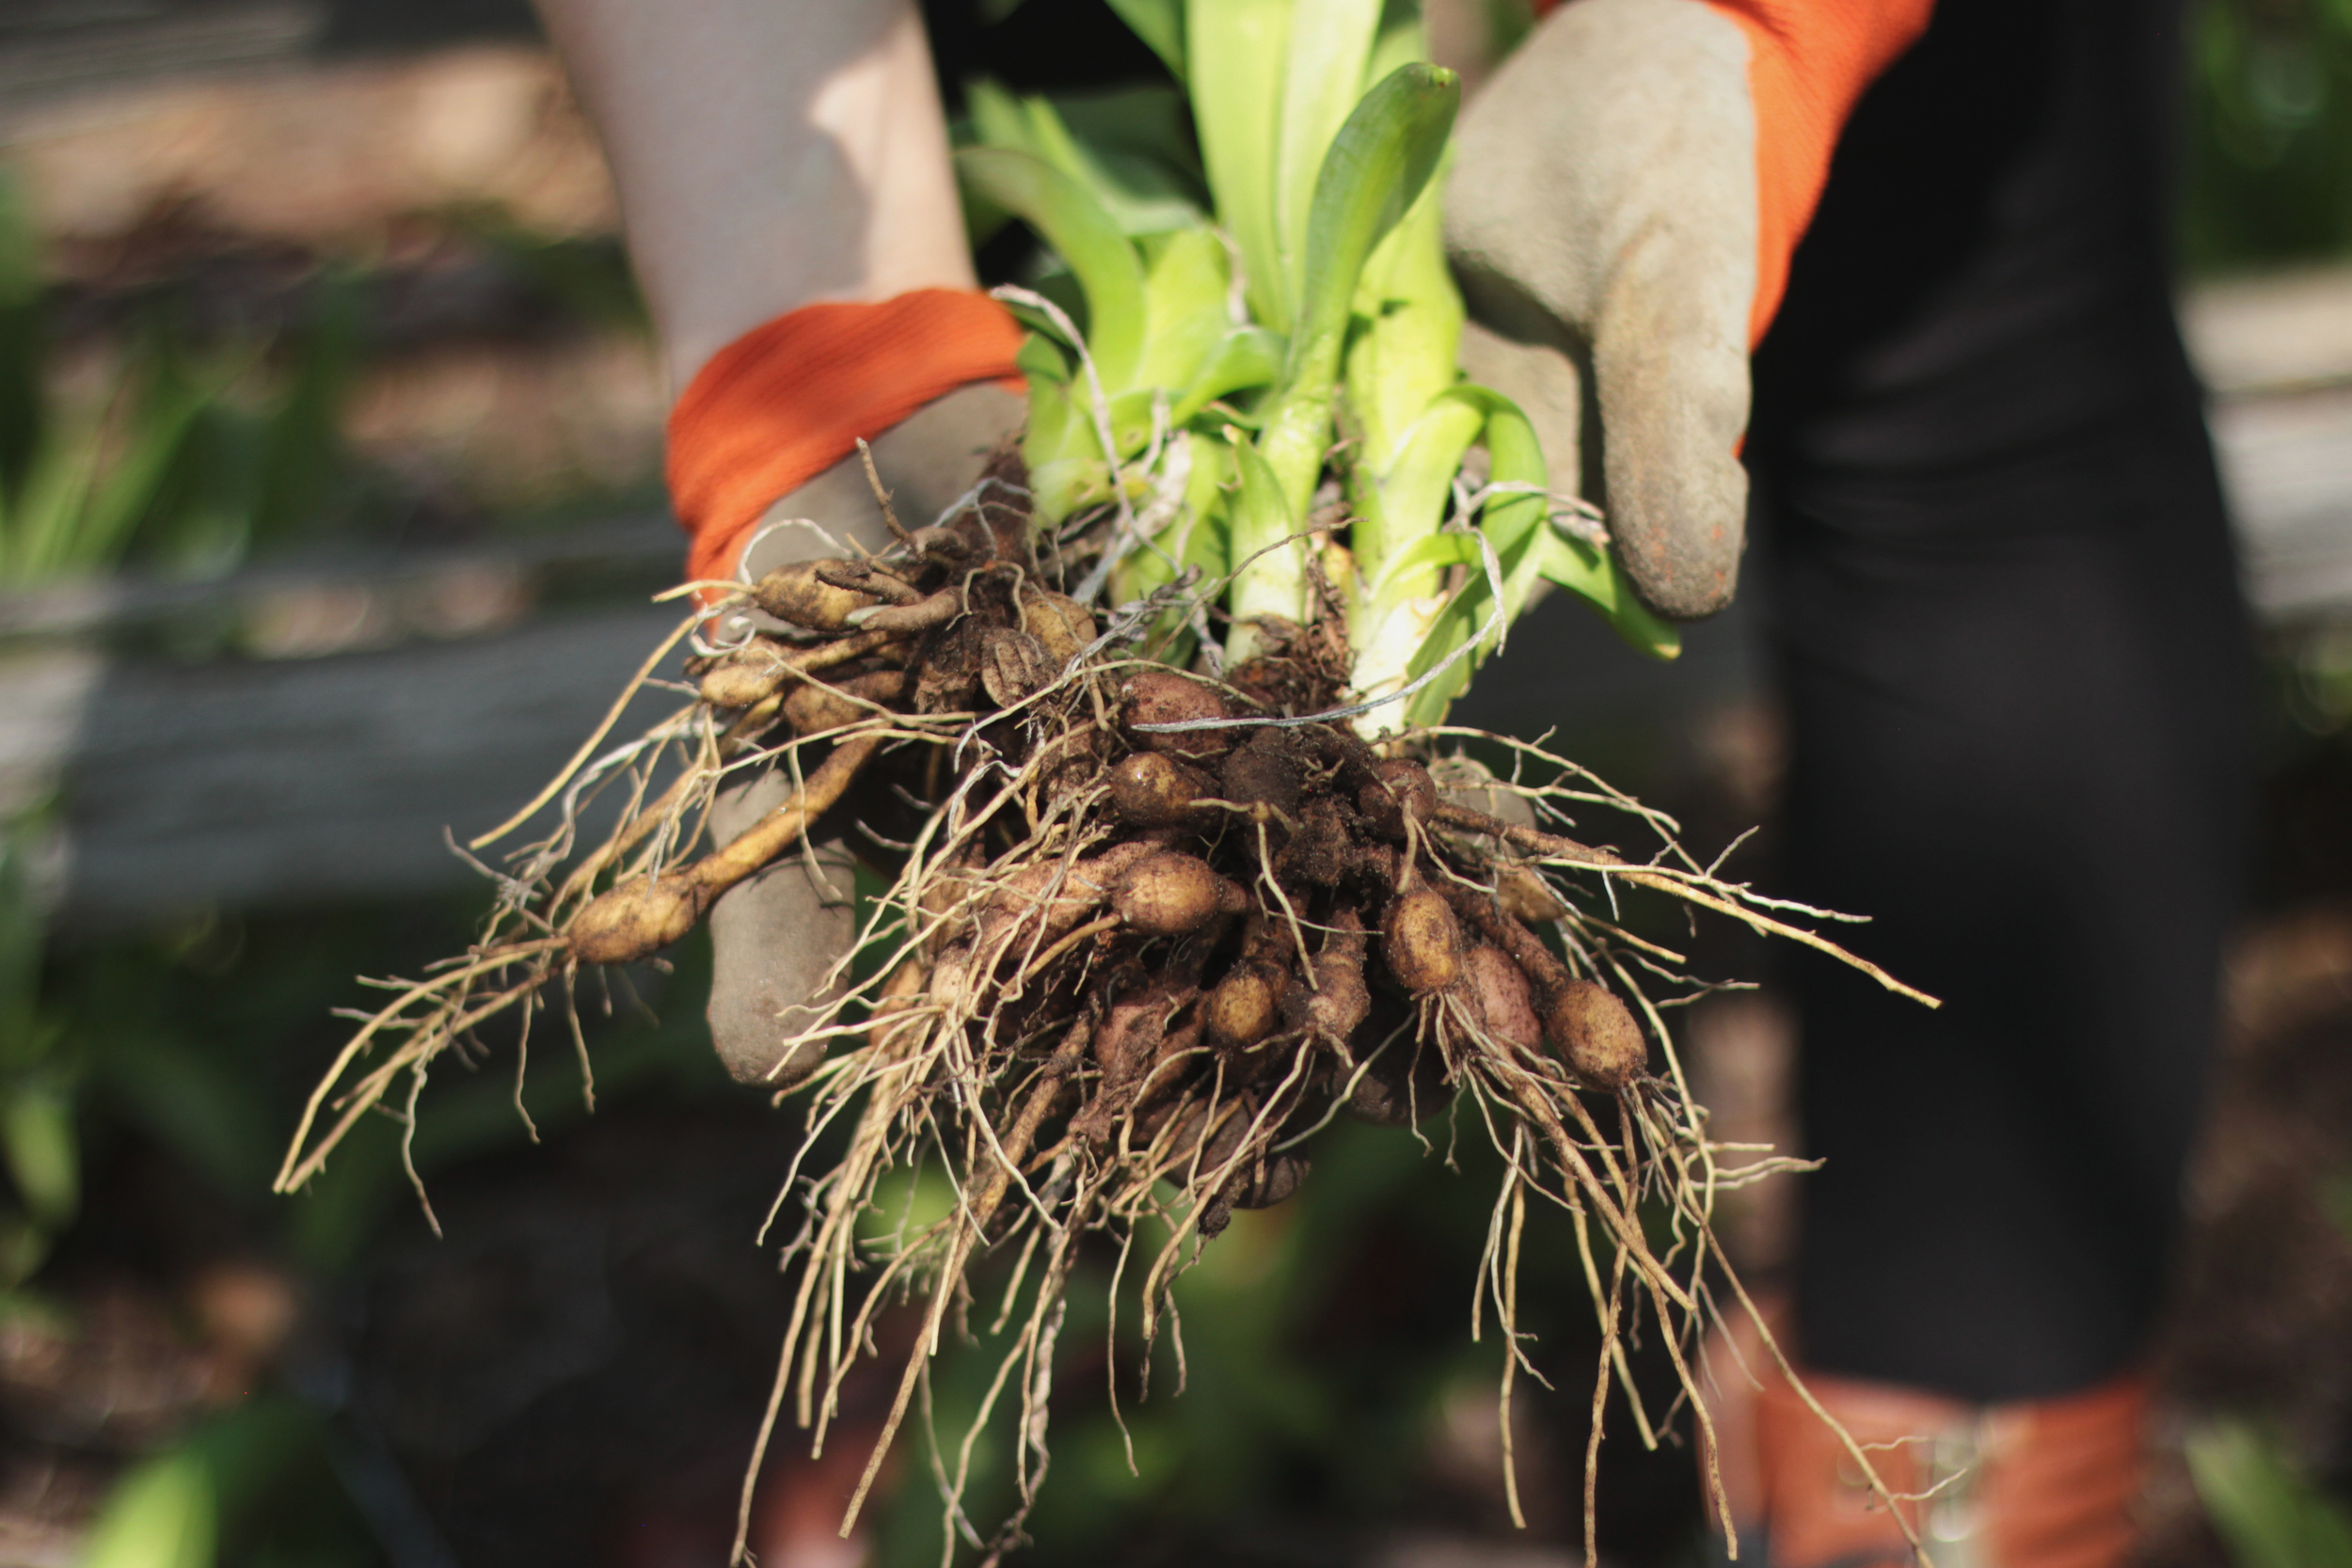
We do not normally harvest the root, but this is what the wild leek bulbs look like, for identification purposes. Wild leeks have white bulbs similar to spring onions and reddish stems that emerge from the earth separately, leading up to the long green leaves. But probably the best way to identify them is by their pungent garlicky onion smell.

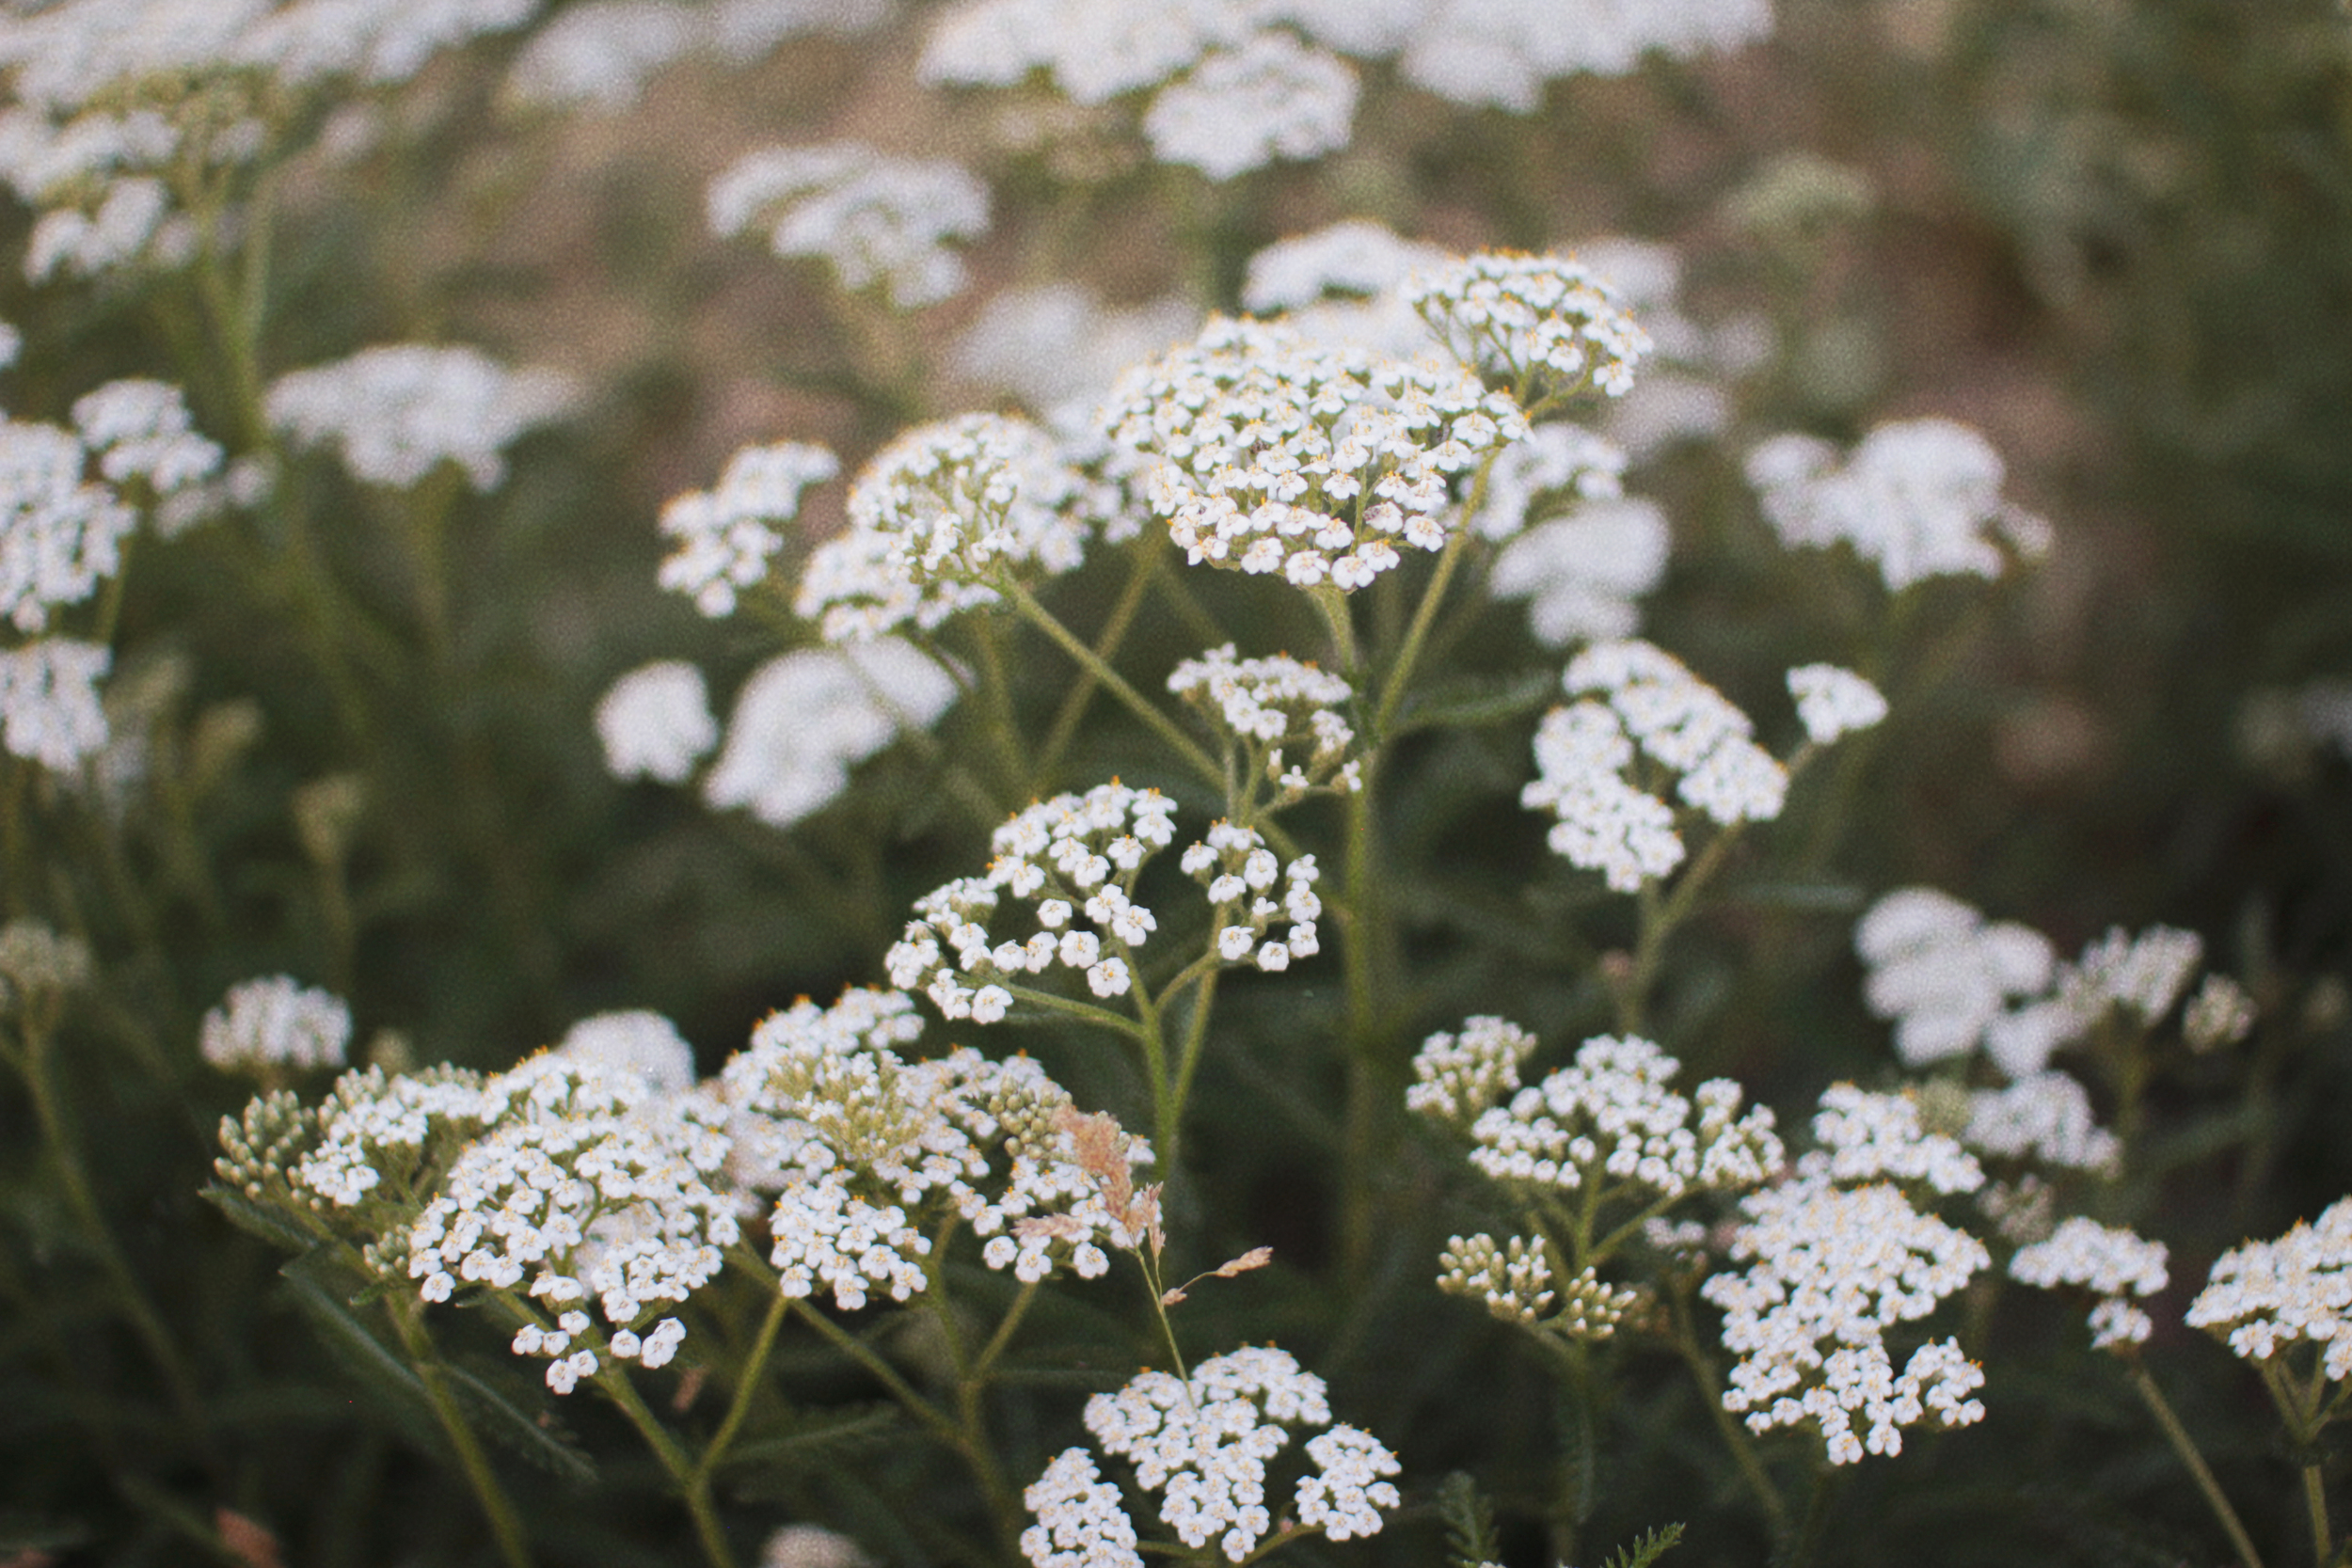
Avoid the wild leek's deadly poisonous lookalike, lily of the valley. We have seen these plants grow side-by-side on more than one occasion, so make sure to pay attention. Lily of the valley have similar long green leaves, but they emerge curled around a single stem and they do not have bulbs, but have longer roots.

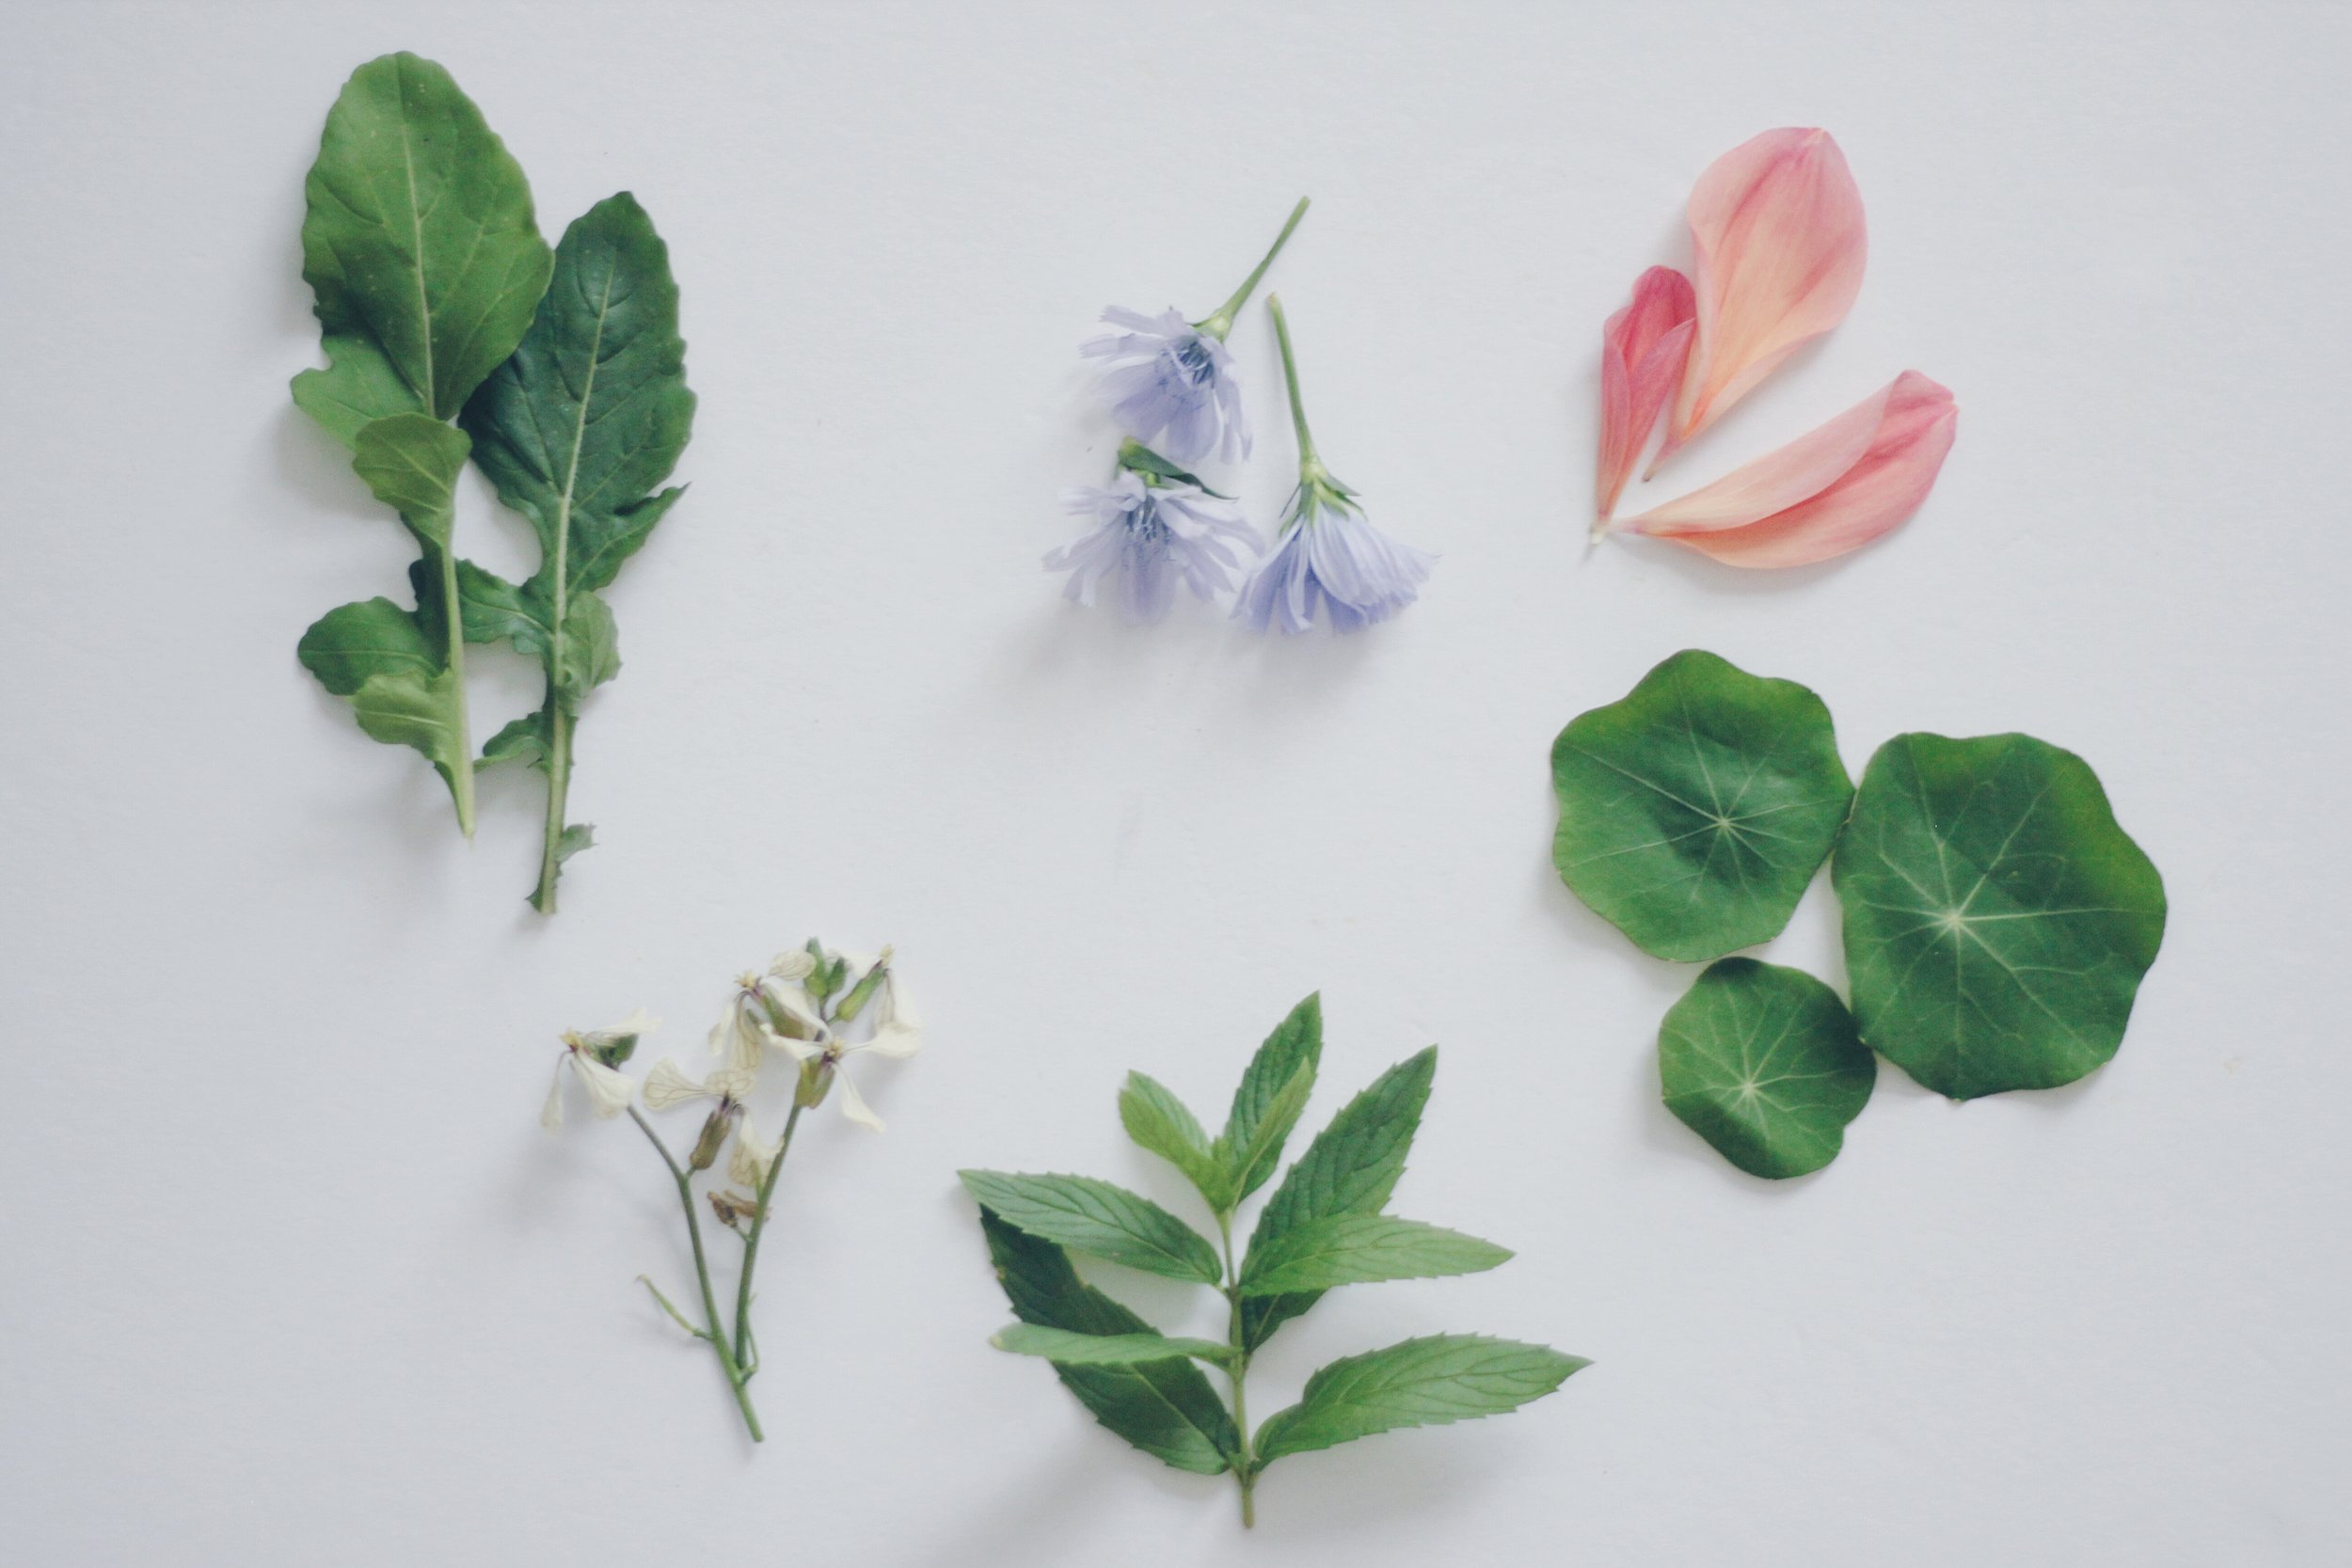
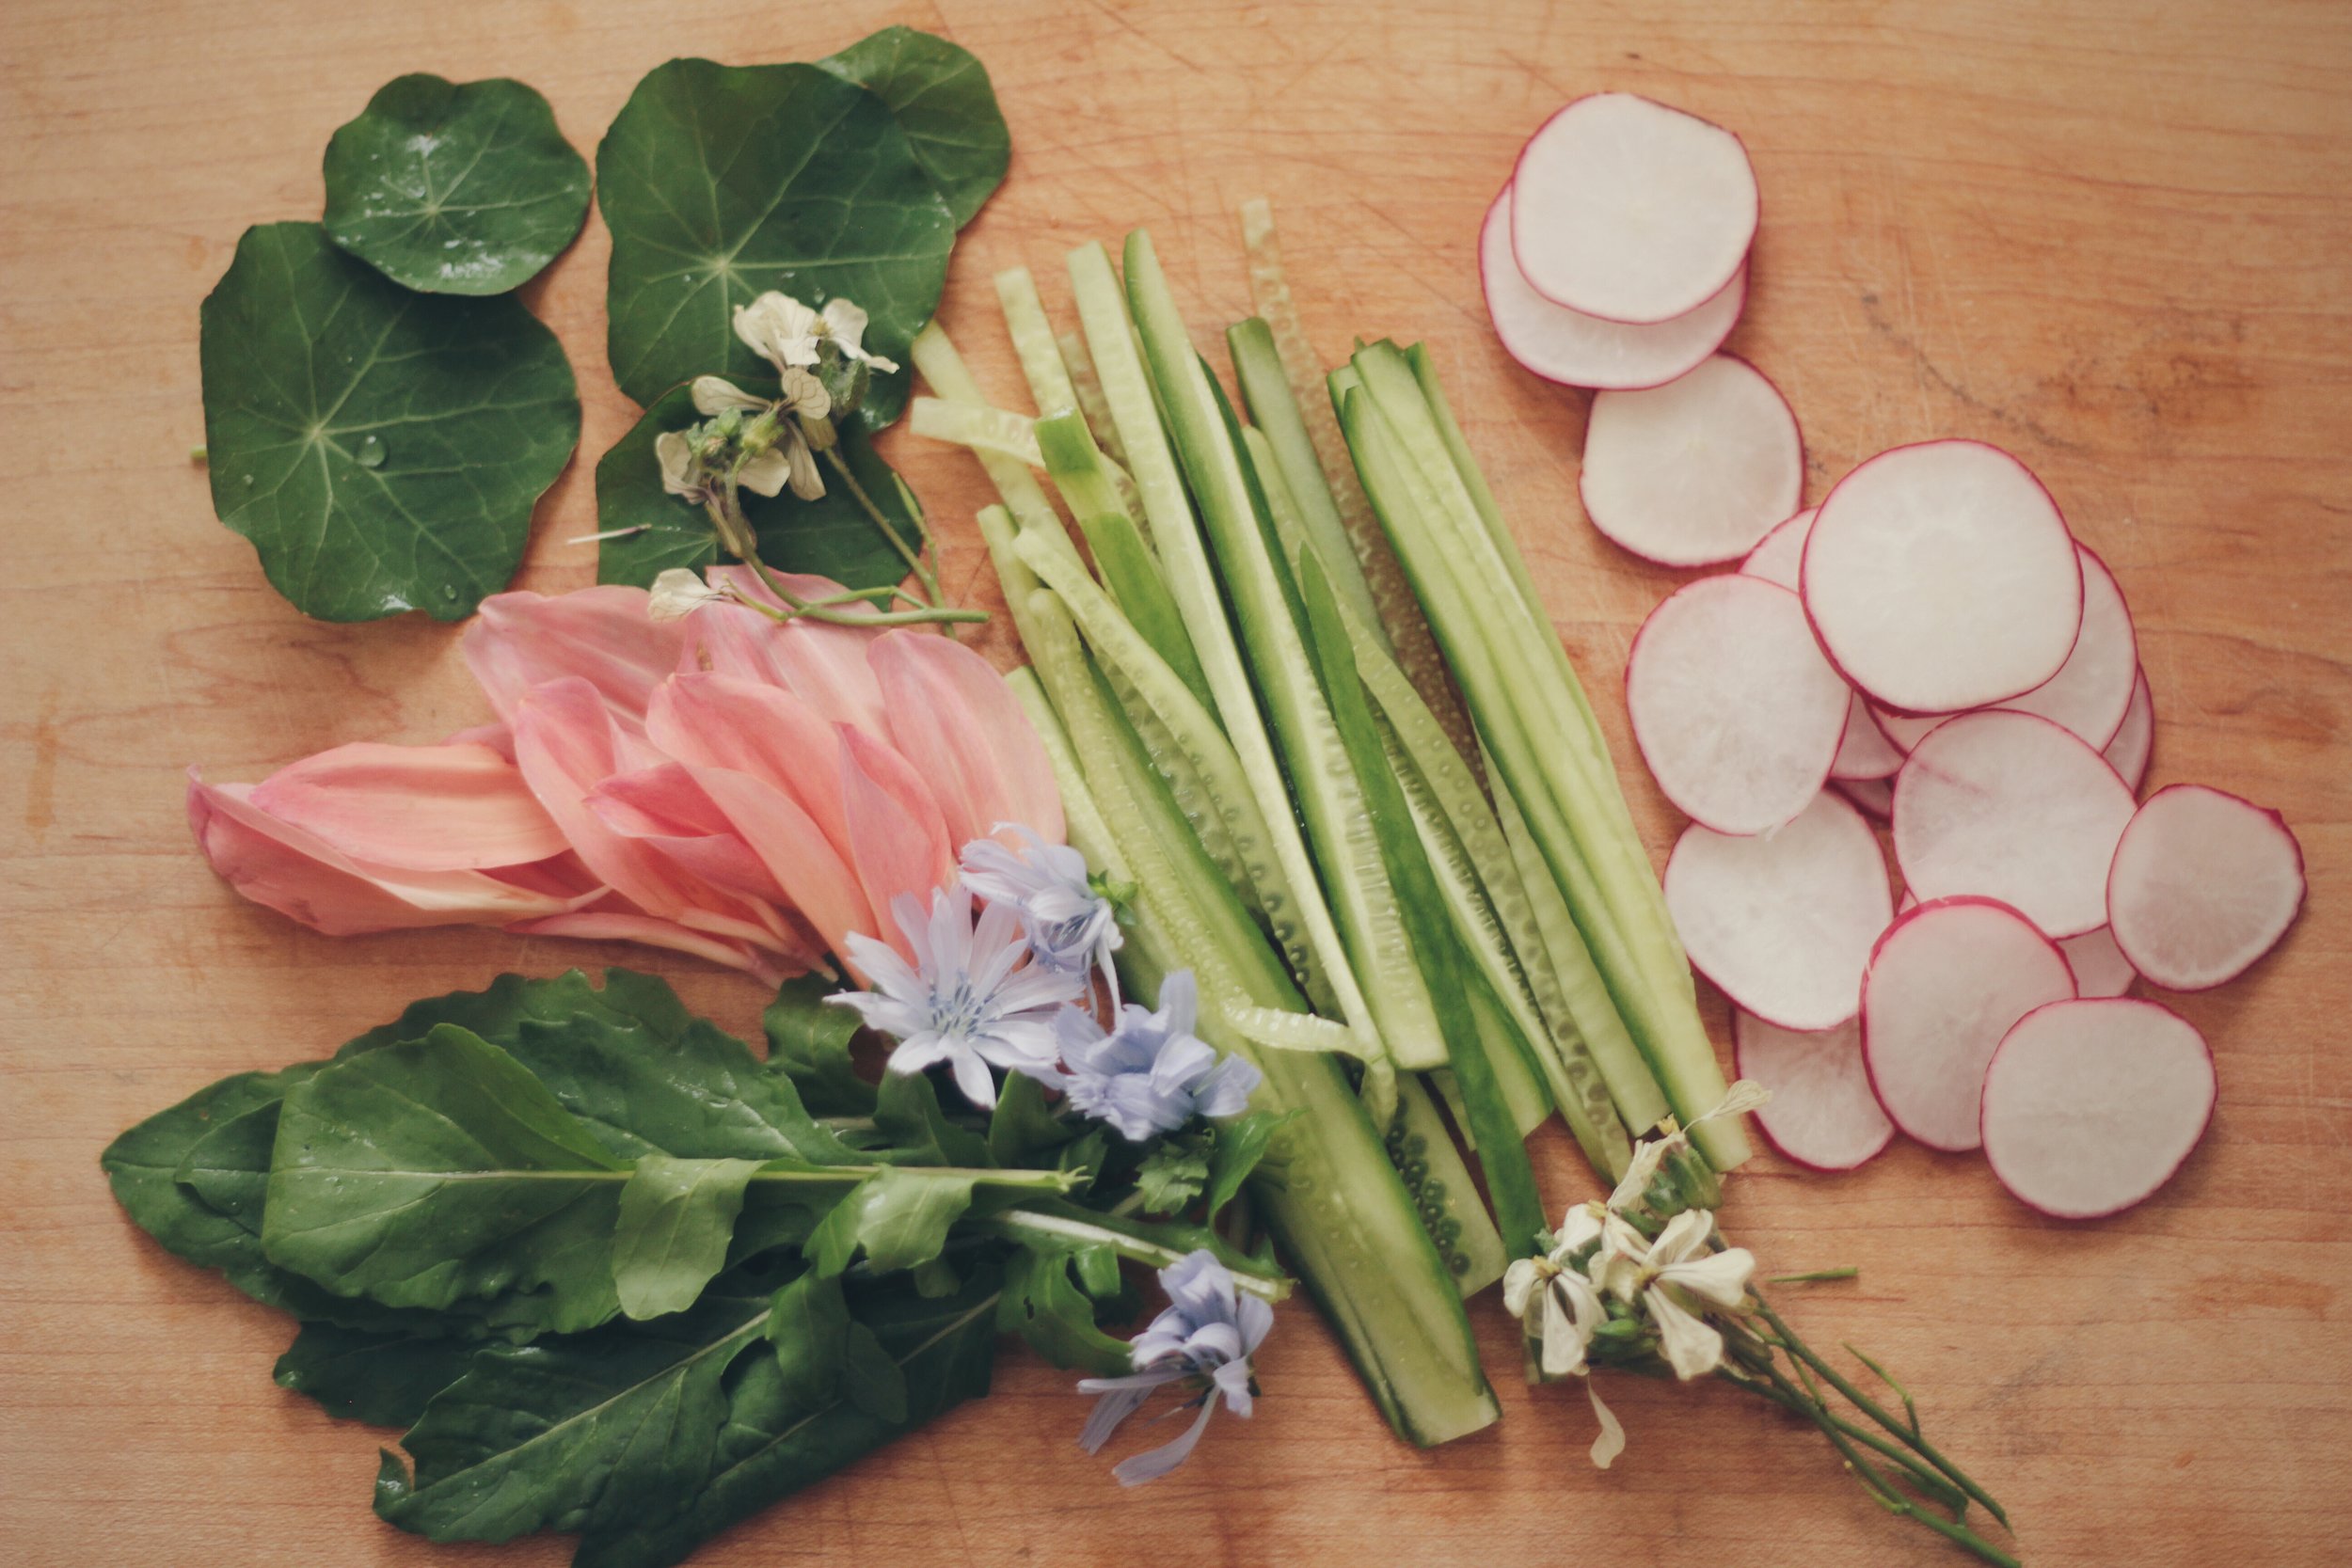
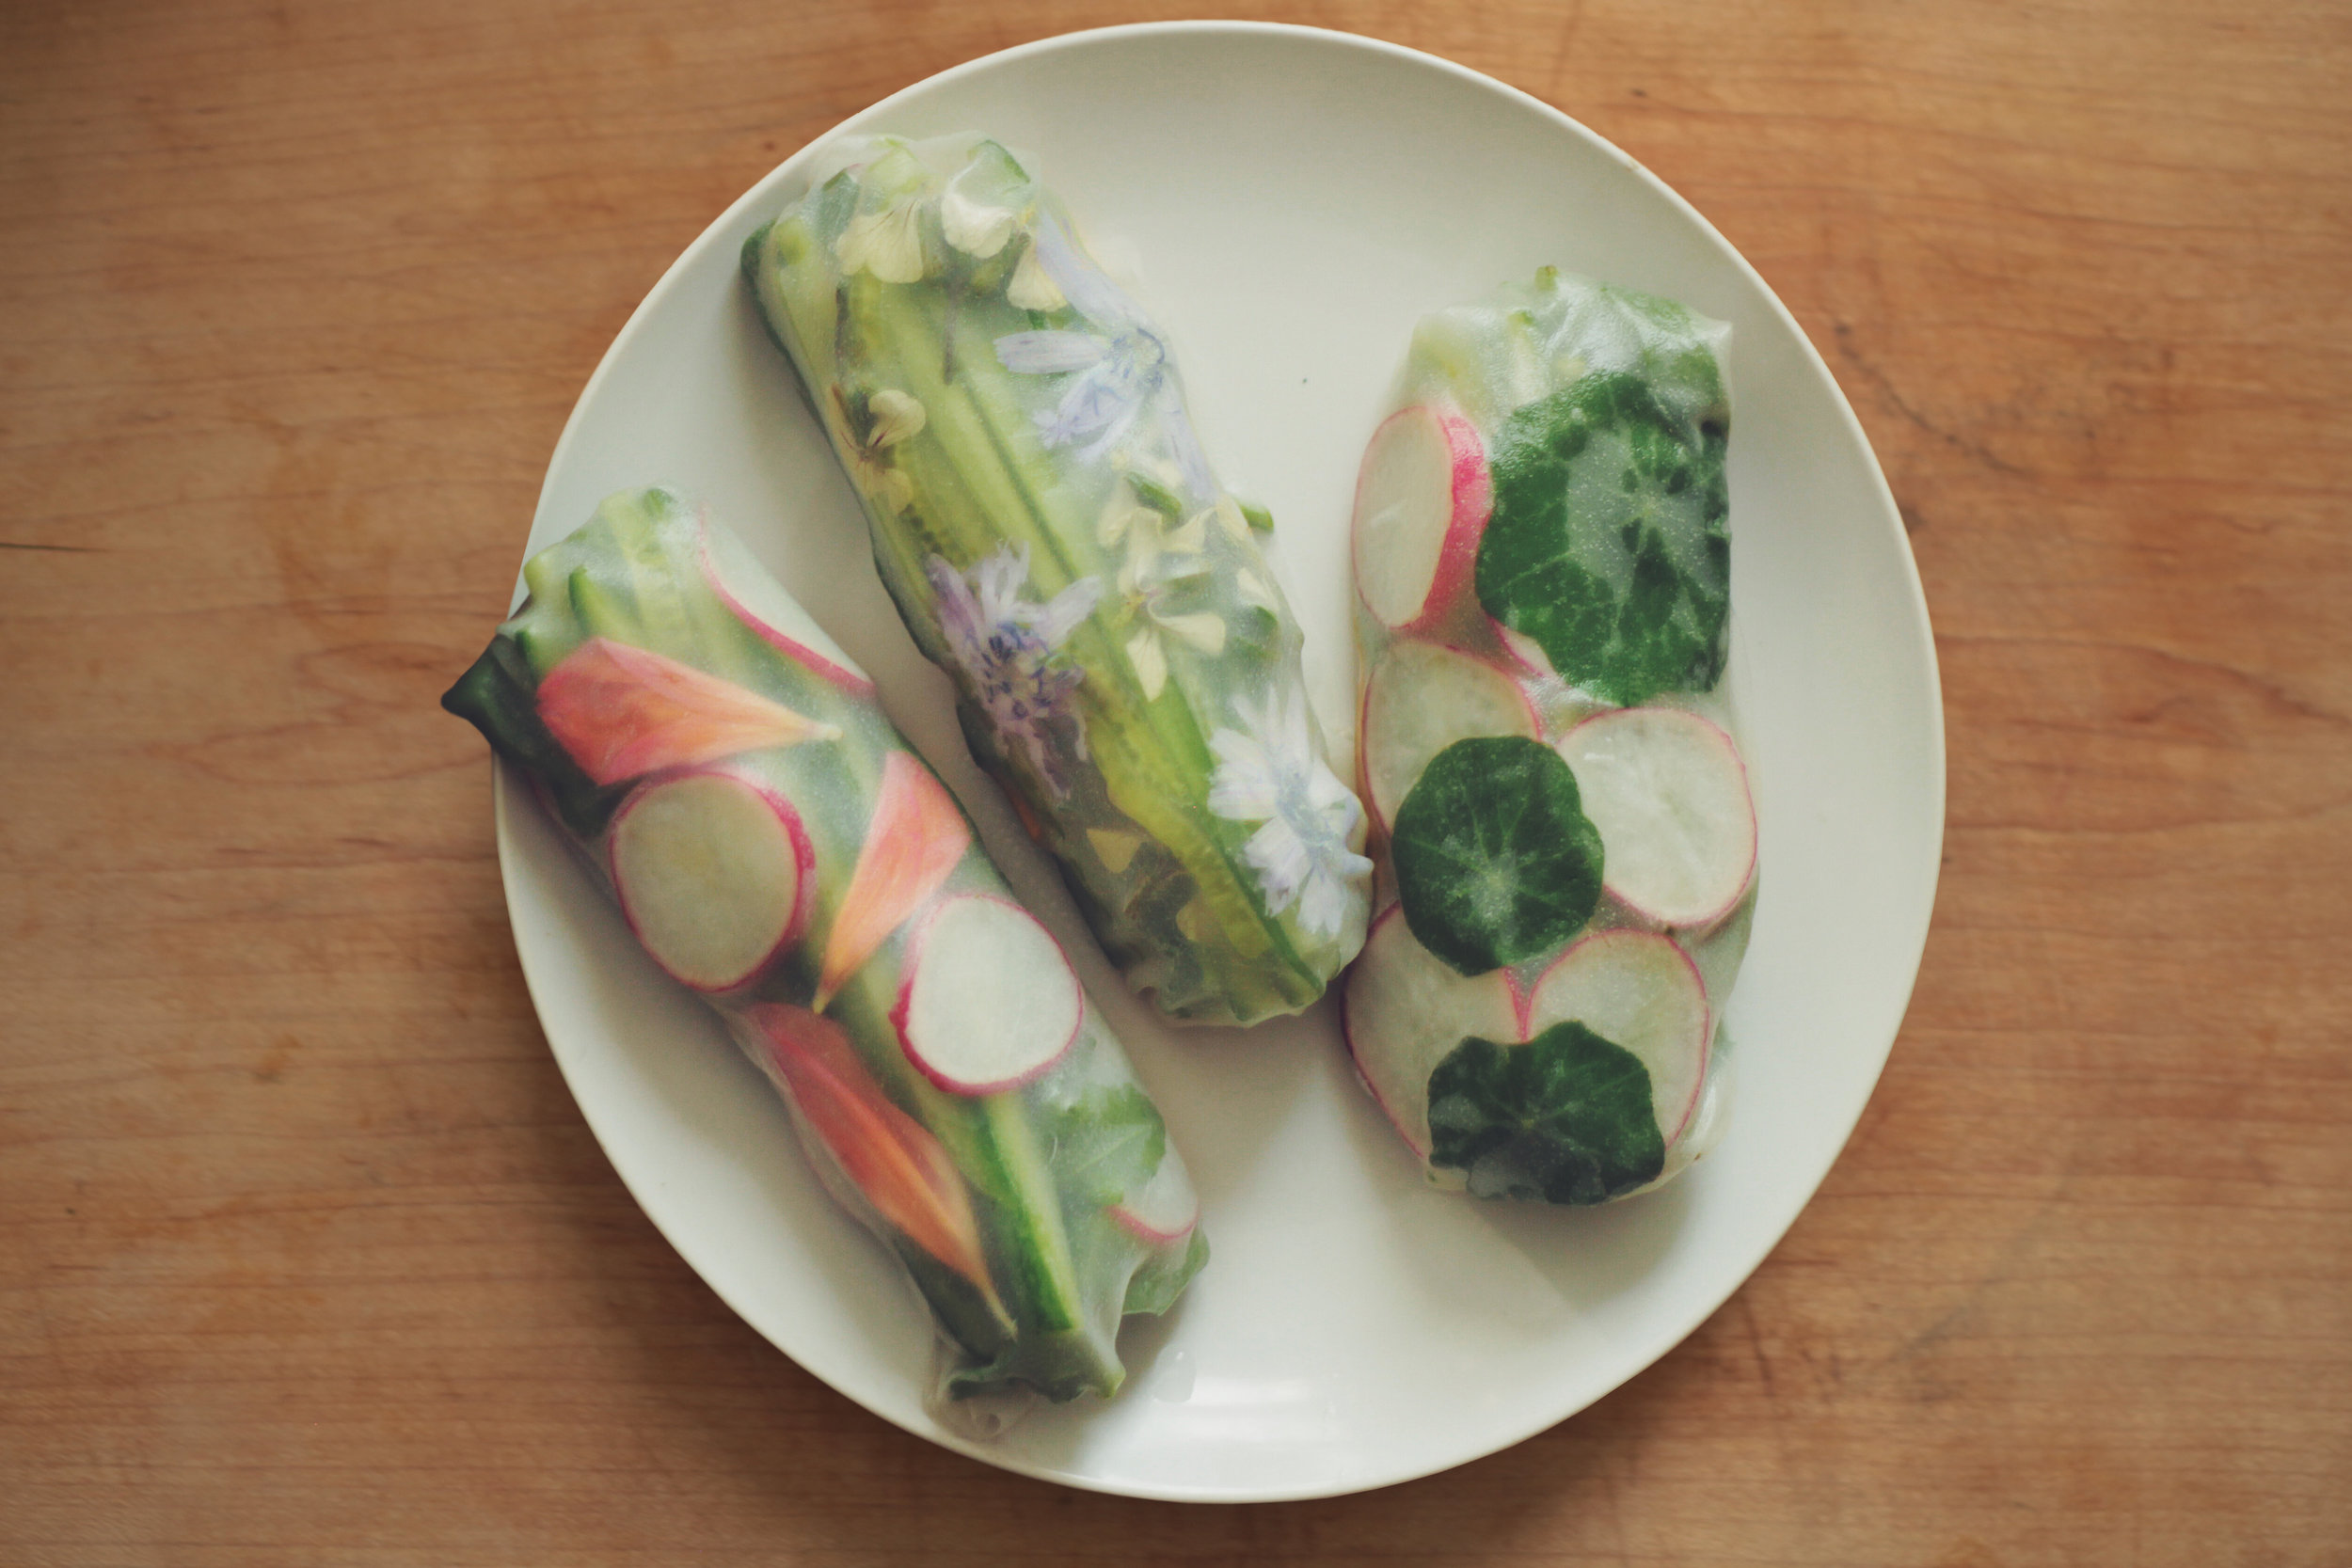
If you don't have access to a wild leek source, don't worry, there are many other wonderful plants available to you. Harvesting certain plants, especially invasive species can even have a beneficial impact to the ecosystem. In this video we also harvested some dandelions from Courtney’s backyard before they flowered and became bitter. At this stage of growth they added a mild and flavourful taste akin to rapini to our pasta. Dandelions are something you don't need to worry about over-harvesting. If you don't have any available where you live, you are sure to find a neighbour who would be grateful to have you take some off their hands. Maybe offer them a little taste of what you make to share the delicious gift they offer!

FORAGED AUTUMN ROLLS

Summer is by far my favourite season. I love everything about it: the warm feeling of sun on my skin, being able to step out of the house wearing just a t-shirt and shorts, and all the fragrant flowers blooming everywhere. That is why, whenever autumn rolls around, I find myself trying to hold on to every ounce of summer that I still can.

Yesterday, while in my garden, I noticed a bunch of early-autumn flowers blooming and decided to make some fresh autumn rolls.

I gathered arugula leaves and flowers, chicory flowers, dahlia petals, nasturtiums, mint and also used some radishes, cucumber, spinach and tamari-marinated organic sprouted tofu. The lovely thing about these rolls is that you can use pretty much anything you find in your garden. The edible flowers added a pretty pop of colour and, for a few minutes, I almost managed to convince myself that it was still summer. I whipped up a quick sauce using organic unsweetened peanut butter, gluten-free tamari, raw wildflower honey, and chili sauce.

Ingredients (rolls)

  • rice paper
  • arugula leaves and flowers, chicory flowers, dahlia petals, nasturtiums, mint (or any edible herbs and flowers of your choice)
  • radishes
  • cucumber
  • spinach
  • organic sprouted tofu (marinated in gluten-free tamari)

Directions

  • wash and chop ingredients into desired strips and thin rounds
  • soak a single sheet of rice paper in a shallow plate of warm water for about 30 seconds
  • remove rice paper and place on a large plate, arrange ingredients in a rectangle in the middle of the sheet
  • carefully roll up the rice paper like a burrito, keeping all the ingredients nice and snug

Ingredients (sauce)

  • 1 tbsp organic unsweetened peanut butter
  • 1 tbsp gluten-free tamari
  • 1/2 tbsp raw wildflower honey
  • 1/2 tbsp chili sauce

Directions

  • mix all ingredients until the sauce is smooth and creamy - feel free to adjust quantities to taste


STAGHORN SUMAC

It's that time of year, when the ravines and hillsides are spotted with the brilliant red fruit of the staghorn sumac (Rhus typhina). Also known as the “lemonade tree,” many people avoid this shrub because they think it is poisonous, but it is actually a delicious sour treat and a great local alternative to lemons. Staghorn sumac are most easily identified by their fuzzy red cones or “drupes.” Their common name comes from the fact that the branches resemble the velvety antlers of a young stag. While there is a type of sumac that is poisonous (Toxicodendron vernix), it is easy to distinguish from staghorn sumac because the poisonous berries are smooth and white, and despite sharing a name, they are not closely related. 

The fruit of the staghorn sumac generally begins to ripen in August, turning a rich crimson colour. The best time to harvest is on a dry, sunny day. If harvested after a heavy rainfall, the fruit will not be as flavourful, as much of the malic acid will have washed away. You can test the sumac before harvesting by rubbing your fingers along the furry fruit and licking them - if they taste tart and lemony, then it is a good time to harvest.

It takes a little bit of work to extract the spice from the plant. Although you could pop the seeds directly in your mouth and savour the lemon flavour, they do not have succulent flesh like typical berries, and most people don’t particularly enjoy snacking on the fuzzy seeds. A very simple way to consume sumac is to make a lemonade by steeping the drupes in cool or room-temperature water (hot water will release the bitter tannins) and then straining out the berries and lightly sweetening the flavoured water.

One of our favourite things to make with sumac is za'atar - a traditional Middle Eastern spice mix which often contains thyme, oregano and/or marjoram and toasted sesame seeds. It is commonly eaten with pita that has been dipped in olive oil, or combined with hummus or labneh. We enjoy sprinkling it on roasted vegetables, sliced avocados or fried eggs. Although traditional za’atar is made with Sicilian sumac (Rhus coriaria) which is native to southern Europe, staghorn sumac works too.

We harvested a large batch of sumac, separated them, cleaned them, removed any bugs and brown bits and let them air dry until they were no longer sticky. You could also speed up the process by putting them in a dehydrator (Courtney puts them on a tray and lets them sit in the sun on the rear dash of her car, which acts as an effective dehydrator in a pinch).

These are the whole sumac berries after being sorted, dried and separated from the stems. The next step is to remove the furry red fruit from the seeds.

We put the sumac in a food processor and whipped it up until the spice had separated from the seeds. Then we passed everything through a mesh strainer. This can be a quite time-consuming process.

These are the seeds and sticks that were left behind. I am told there are other uses for these, but we ended up discarding them.

The beautiful, fine, powdery sumac spice. It is bright and lemony - this is what all the hard work was for!

Now, to make the za'atar. There is no single official recipe and no standard ratios. We make ours with thyme and sesame seeds, some like to use more thyme, while others like the sumac to be the more dominant flavour. Through trial and error, the ratio we have come to use is two parts sumac, two parts toasted sesame seeds, one part thyme and salt to taste.

Za'atar can be used on any number of dishes, however we prefer not to cook with it, as heat changes the flavour and destroys the delicious tartness, so we use it as a condiment and sprinkle it on meals after they have been served.

Ingredients

  • 2 parts sumac spice
  • 2 parts sesame seeds
  • 1 part dried thyme
  • sea salt

Directions

  • toast the sesame seeds over medium heat in a dry skillet just until they begin to turn brown
  • grind up the thyme in a mortar and pestle until it begins to break down (but before it becomes a fine powder)
  • wait until the sesame seeds have cooled, and then mix all the ingredients together
  • salt to taste


NOTE: In rare cases, while staghorn sumac is not poisonous, some people may have an allergic reaction to the plant. Those who are allergic to cashews or pistachios are most likely to react, as they are part of the same family. If you think you might be allergic, you can rub some of the plant on a small patch of skin and wait for about an hour. If a rash appears, then it is best to stay away from this plant. Regardless, it is always a good practice to consume only a small amount when trying a new food for the first time.

YARROW TEA

The botanical name for yarrow is Achillea millefolium. The genus name Achillea comes from an ancient Greek myth about the Trojan hero Achilles. As the story goes, when Achilles was a young boy he was brought to the centaur Chiron who was a teacher and healer, and became a mentor to Achilles. Chiron taught him the ways of the gods and bestowed upon him the plant yarrow, teaching him about its healing properties. Achilles took this knowledge to the battlefield and used it to staunch the bleeding wounds of his soldiers. For this reason, yarrow is also sometimes known as herba militaris, or soldier’s herb.

Its specific name millefolium meaning “thousands of leaves”, refers to the profusion of small feathery, fern-like leaves.

This plant has also historically been used as a divination tool. Chinese cleromancers would use bundles of 50 dried yarrow stalks that were cut uniformly and removed of leaves to cast the I Ching. Although nowadays most people use coins, some diviners still prefer to use the traditional yarrow stalks.

Yarrow’s medicinal properties are characterized as astringent and drying. Because of this, it is a great herb to have in your first aid kit. A simple yarrow poultice can be used as a styptic and antiseptic, to stop bleeding and disinfect small cuts and nosebleeds.

In ancient times, yarrow was associated with witchcraft as it is a very potent healing herb. It can both staunch and stimulate blood flow and is wonderful for women’s reproductive health, as it can be used to both decrease heavy menstrual bleeding and stimulate a delayed menstrual cycle - I have heard it called "master of the blood."

In these photos, we harvested a bunch of yarrow tops - including the leaves and flowers, dried them on elevated wire racks for about two weeks, and made it into a medicinal tea for later use. I have been experimenting with drinking the tea a week before the onset of my cycle, as it is supposed to ease the symptoms. Because yarrow is drying and tends to strip away, we like to follow it up by consuming something with emollient and demulcent qualities such as calendula or mallow. These marshmallows perhaps?

(Yarrow is an emmenagogue and should be avoided during pregnancy. I have also read reports of it being used as a contraceptive, so use only for a short time).

I steeped the dried yarrow in freshly boiled water for about ten minutes before consuming. The tea is fragrant and tastes a bit like a combination of chamomile and something vaguely coniferous - if you are bothered by the bitterness, you can add a little bit of honey.

MARSHMALLOW

Last week, we featured marshmallow (Althaea officinalis) flowers in our post on edible flowers, this week, we used marshmallow root to make some tasty marshmallows!

Though the modern marshmallow mainly consists of sugar and gelatin, marshmallows used to be made with marshmallow root. The plant's genus name Althaea comes from the Greek althein, which means "to heal." Because of the its demulcent and emollient healing properties, the original confection was created for medicinal purposes, to soothe sore throats and calm irritated digestive tracts. The use of marshmallow both medicinally and as a treat can be dated back to Ancient Egypt, where they would make a concoction using sap extracted from the plant and sweetened with honey. Years later, another version of the candy showed up in France made with egg white meringue, called pâte de guimauve.

These marshmallows are infused with marshmallow root and sweetened with local organic unpasteurized honey, so they are not only a delicious treat, but might actually help next time you have an irritated throat, dry cough or an upset stomach.

We included rose petals in our infusion to add a subtle floral flavour, and because roses are a calming complement to mallow and can also be used as a traditional home remedy for sore throats. 

But that doesn't mean I'm going to wait until I have a cold to eat these marshmallows. I just put some in my dandelion "coffee" and they made the most dreamy, fluffy, sweet, marshmallow foam.

Ingredients

  • 4 tbsp organic gelatin powder
  • 1 cup hot water
  • 2 tbsp marshmallow root
  • small handful of dried rose petals
  • 1 cup organic honey
  • 1 tsp rose water
  • cornstarch for dusting

Directions

  • line your baking dish with parchment paper
  • place marshmallow root and rose petals in a small bowl and add hot water. Let sit for 15 minutes, strain and reserve the infused water (make sure it still equals one cup)
  • pour 1/2 cup of your infused water into a large bowl or mixer. Add the gelatin and mix quickly to ensure it is evenly incorporated. Let it sit while you continue with the honey syrup. The gelatin mix will solidify
  • meanwhile, pour the other half of your infused water and your cup of honey into a medium saucepan
  • bring the honey mixture to a boil. Once it boils, stir constantly for about 7-8 minutes - make sure it does not boil over. (If you are using a candy thermometer, remove the pan from the heat as soon as it reaches 240°F, or the soft ball stage)
  • use the mixer or handmixer to begin breaking up the gelatin mixture and slowly begin pouring in the honey syrup along the side of the bowl
  • once all the syrup is added, turn the mixer to high and whip for about ten minutes until the mixture fluffs up and begins to form gentle peaks
  • during the last minute of mixing, add the rose water
  • working quickly, pour the marshmallow cream into your lined baking dish and smooth with a greased spatula (or place a layer of cling film on top, and smooth the surface with your hands
  • let sit at room temperature for 4-6 hours
  • remove cling film - dust a cutting board with corn starch and turn the marshmallow pan onto the cutting board
  • slice into individual marshmallow cubes with a greased knife
  • dust marshmallows with cornstarch to keep them from sticking

STINGING NETTLE

We have been craving this plant. Everything about its deep rich green colour packed full of nutrients as food and as a medicinal ally appeals to us. Consuming this plant always makes us feel healthy, strong, and ready to face the world.

Strangely, over the last few years we have had a difficult time tracking down stinging nettle (Urtica dioica). While we have had access to wood nettle which has similar properties, we’ve only ever been able to find sparse patches of nettle, until now.

We came to the Stone Boat Farm Artist Retreat hoping to find stinging nettle on the property and had been speaking about this plant with our host Amy Nostbakken. Amy asked us about our luck finding any on our first few wanderings, which had been fruitless.
“How do you identify them?” she asked.
“Well,” we said, “Definitely the most obvious way is by the stings."
 “Ohhhhhhhhh!!" said Amy, "I know that plant! I always thought it was poison ivy. My brother and I would get stung by them all over our legs when climbing the apple trees!”

And so, we ventured over to the shady apple trees and sure enough we came across an enormous patch of stinging nettle.

While we weren’t too concerned about the population of stinging nettle, we still aimed to harvest only the tops - pinching them just above the intersection of the fine toothed slightly heart shaped leaves. This ensures that the plant will continue producing and also prevents it from going to flower. This is important if you want to harvest the leaves from the same plant throughout the season as some claim that after flowering, stinging nettle leaves contain cystoliths which could irritate the kidneys. However, this compound is destroyed after drying, so does not pose the same concern for dried tea.

Courtney harvests stinging nettle with her bare hands, making claims to the antihistamine properties of nettle stings and their ability to increase circulation and ease joint pain. Others prefer to use gloves as the hairs on the nettle stalks and leaves contain formic acid which cause quite a bit of irritation that can last for anywhere from a few minutes to several days. We don't worry too much about that, as one of the antidotes to nettle stings is the juice from nettle itself! 

We decided to see if we could transplant a few because we love the idea of having a nettle patch in our home gardens.

One of the other artists at the farm, the talented dancer Nyda, joined us in harvesting this delicious medicinal plant.

“It’s so funny because before we went up to Stone Boat I’d been reading about nettle in terms of kidney cleansing and supporting liver and skin, and I couldn't find any here in Toronto. I work in an organic grocery store part-time and checked the Big Carrot. I went all over the city to different health food stores and wasn't able to find it anywhere.  And then I came out here and there were whole fields of nettle." Nyda laughs at the overwhelming abundance of stinging nettle.

"Because I work with my body I want to feed it everything I can that is going to support it. It's mainly for the health benefits of nettle that I will keep seeking it out, and I want to plant the one that I have.”

We brought our bounty back to the farmhouse and made some delicious mineral-rich medicinal tea by pouring boiling water over the leaves. Nettle loses its stinging properties the moment it is cooked or covered with hot water.

Like most wild-crafted foods, nettle contains substantially more nutrients than many other known "superfoods" including iron and calcium (much more than spinach and kale) magnesium, silica, vitamins, phosphorus, trace minerals, and protein. It is used to treat anemia, rheumatic ailments such as arthritis and gout, and various skin conditions including acne and eczema. Nettle also has antihistamine properties and we've used it to both treat and prevent seasonal allergies. 

In an effort to consume nettle in every possible form, we fried up a bunch of the leaves with dandelion buds and flowers, and wild leeks for lunch.

We cannot begin to sing this plant’s glory enough, and this one article by no means covers its diverse uses and applications. We put some nettle aside to dry for future recipes and will continue to write about it in future posts!

DAYLILIES

A few years ago, I made the mistake of making Nadia taste a daylily flower that was past its prime. Since that experience, she has refused to try anything daylily. Finally, last week, I was able to convince her to give them another chance by cooking up some of the tasty spring tubers, which are reminiscent of fingerling potatoes.

We harvested daylily (Hemerocallis fulva) tubers along with the shoots for a side dish to accompany our meal. Daylilies are a potentially delicious and abundant food source throughout the year. Each part of the plant is edible at some point during its growing stages. Once you get to know this plant you will notice them everywhere - from gardens to roadside ditches.

Hemerocallis fulva along with its many cultivars and relatives are not related to the lily family (Lilium species, many of which are very poisonous), but have a similar flower appearance. Daylilies get their common name from the fact that each individual blossom lasts for only one day.

A note to novice foragers is to be wary of confusing daylily shoots for that of the poisonous iris. I can always tell a daylily apart by its rich light green colour (Nadia refers to it as “spring green”) and the shape of its long leaves which are folded along the midrib, as opposed to the flat sword-like leaves of the iris. Someone once described them to me as looking like two hands facing each other, about to clap. Daylilies have a cluster of tuber roots with hairy rhizomes (see photos) unlike the knobbly bulbs of irises.

The roots become mushy after the plant produces flowers. The best time to harvest daylily tubers is between late fall and early spring when the plant is putting all its energy into the roots. The young shoots in early spring are a pleasant crunchy snack - great for nibbling while you're gathering, or for adding to a salad or stir fry. Generally, daylilies propagate quite easily. I find that there are always a few renegades that try to sneak out of my garden borders which are perfect for picking.

Think of getting to know a plant in all its seasons and in a variety of settings before harvesting, and make sure you know it well - you wouldn’t trust your life in the hands of someone you just met! But if you are certain of its identification, then harvest away.

It is also a good practice to eat only a small amount when trying a new food for the first time. Daylilies have a laxative quality and have been known to give a small percent of the population an upset stomach, so sample a small portion first before making them into a main dish for your meal.

We cleaned the tubers thoroughly, removing the rope-like bits, and boiled them in water until tender but still firm. We fried up some wild leeks (see wild leek post) in butter in a skillet and added the daylily tubers, frying them for another few minutes. The fried tubers made a great starchy accompaniment to our meal and had a similar taste and texture to potatoes. Nadia promptly reformed her opinion of daylilies. The next challenge will be to get her to try the flowers!

Ingredients

  • daylily tubers
  • wild leeks, shallots, onions or garlic (your choice)
  • butter or oil

Directions

  • place daylily tubers in a pot of boiling water and cook until tender but still firm
  • fry wild leeks, shallots, onions or garlic in skillet with oil or butter
  • add the tubers to the skillet and fry for approximately five minutes
  • salt and pepper to taste

LILAC HONEY

I wish you could smell my kitchen right now. The air is heavy and full with the intoxicating perfume of lilacs (Syringa vulgaris). There is something so romantic and dreamy about their fragrance which I look forward to every spring. This year, I wanted to try to capture their scent in some way, so that I could bottle it and consume it year-round. 

Happy to find out that the blossoms are edible, I decided to make a simple lilac-infused honey.

I harvested a bouquet of various types of lilacs and plucked the flowers from their bitter stems, filling a jar and packing it to the brim.

The honey I had on hand was a raw local wildflower honey which had crystallized. But it didn't matter, because once the honey was added to the flowers, it began to draw out the liquid through the process of osmosis, turning into a syrup. I sealed the lid tightly and allowed the flowers to steep overnight.

The next day, the contents of the jar had shrunk down to about a third and the flowers had floated up to the top. 

After straining out the flowers, what was left was a beautiful fragrant syrup, tasting distinctly floral and faintly spicy, with a little bit of bitterness softened by the sweetness of the honey.

Ingredients:

  • lilac flowers, picked from stems
  • local raw honey

Directions:

  • fill jar with lilac flowers
  • pour honey overtop
  • allow to steep overnight
  • once the flowers have risen to the stop, strain and preserve the syrup.

OSTRICH FERN FIDDLEHEADS

Around Peterborough, we have stopped harvesting fiddleheads all together as we have watched their population decline due to over-harvesting and their increase in popularity. Here however, in the north-eastern woods of Lanark County, Ontario, we were told by the landowners that this delicious, tender spring food runs rampant on their property.

We ventured into the woods slathered in our handmade catnip bug repellent and suited up in bug net jackets to protect us from black flies and ticks. The rich loamy smell of the swamp felt good in our lungs and we exclaimed in amazement as we came across an abundant crop of ostrich fern fiddleheads slowly unfurling.

When foraging, we always consider sustainability, keeping the intention to enhance the ecosystem whenever possible and never to hinder it.  We harvested the larger juicy looking tendrils, leaving smaller ones that may have been from younger plants. We also made sure to take only two out of five or six tendrils to ensure that we didn't damage the plant too much and that it had enough energy to regenerate itself for future years. We also made sure to harvest close to the stalk, many people only harvest the top fiddles, but the stalks are equally if not more delicious and provide even more bounty to your harvest as long as the tops are still tightly wound.

We distinguished the ostrich ferns (Matteuccia struthiopteris) from some poisonous relatives growing alongside by noticing their relatively larger size, papery scales (similar to onions skins), the deep grooves on their stalks and the brown feather-like fronds that grow from the same raised rootstock (for a complete description of Ostrich Ferns see Samuel Thayer’s excellent book The Forager’s Harvest).

The above two photos are NOT ostrich ferns. Learn to distinguish ostrich ferns from other poisonous look-alikes before harvesting and consuming them on your own.

Courtney carries her harvested bounty in her sun hat.

We cleaned the fiddleheads by removing the papery scales and soaking them in cold water for an hour. After rinsing several times, we steamed them for five minutes until they changed to a lighter, pale green.

We fried some wild leeks in butter and a bit of salt in a cast iron skillet and added the fiddleheads, frying them for another few minutes until tender. We added salt, pepper and lemon to taste.  Delicious!